Sheet Mulching knocks down the weeds

Got a weedy lot? A dying lawn that needs replacing? Want to improve soil for a new landscape project? Then it is time to consider the benefits of sheet mulching.

What is sheet mulching?

Imagine laying out a magic carpet that improved the soil but decreased the need to weed and water too. That magic carpet is a layering technique that utilizes recycled cardboard, compost and wood chips. It’s really very low tech and simple to do in most any garden application.

Here are the basic steps:

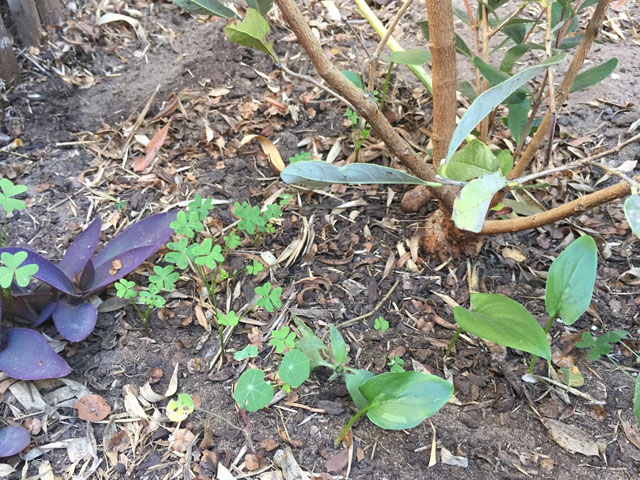
  • Remove or cut back any tall or thick stemmed plant materials that will poke up under the cardboard. Low lying weeds or weed whacked grasses can just be covered up with cardboard because they will just breakdown and add to the soil.
Oxalis and Calla lily are very persistent in this area of the garden. This is where sheet mulching can really help knock back unwanted plants.
Collect LOTS of cardboard for a sheet mulching session. It is okay to do in stages if it is hard to find or store materials too.

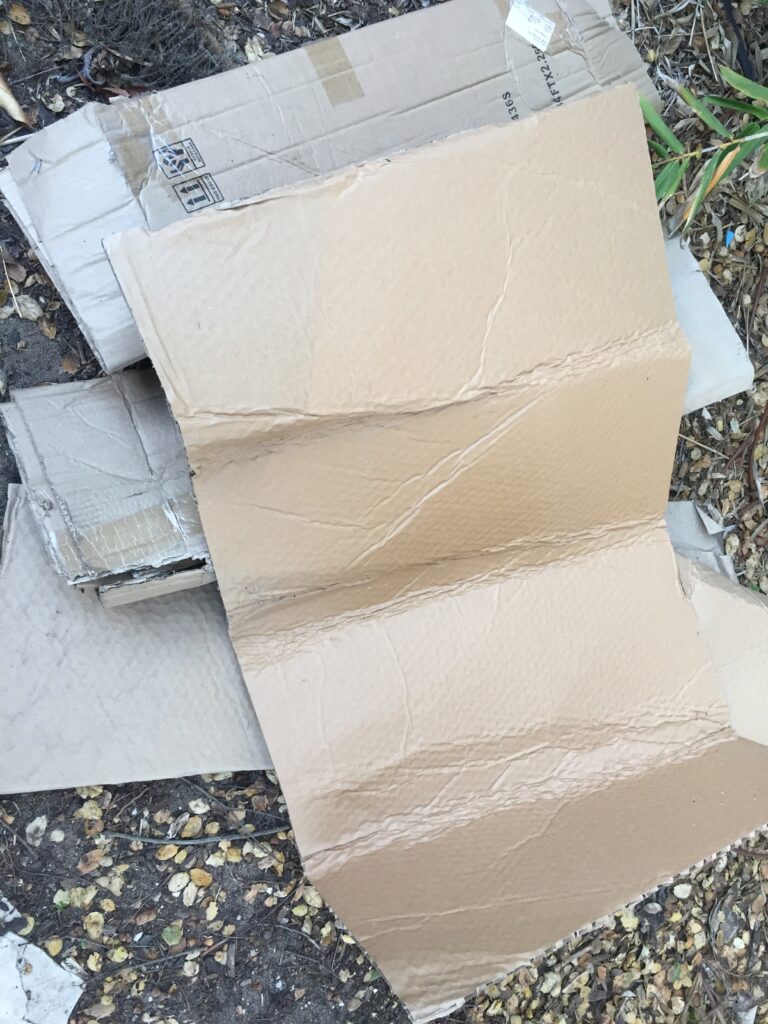
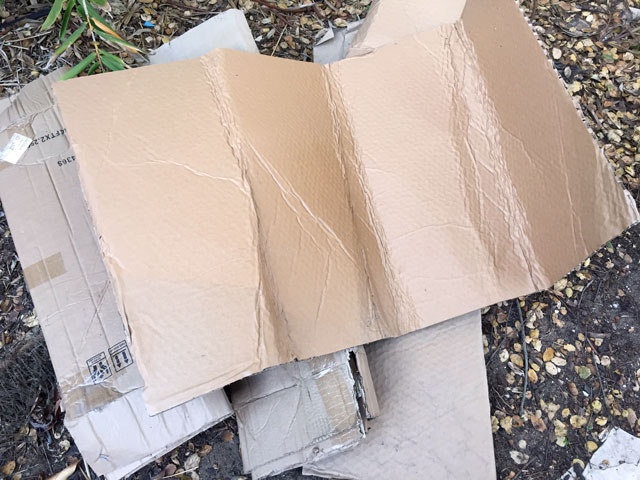
Collect lots of cardboard!

  • There will need to be some cardboard collecting in advance of the sheet mulching event. Look for non-waxed large boxes that can be broken down flat. Smaller pieces can be used to fill in and around gaps in the cardboard so get a range of sizes. It is okay to double up cardboard in problem areas to really squelch the weeds.
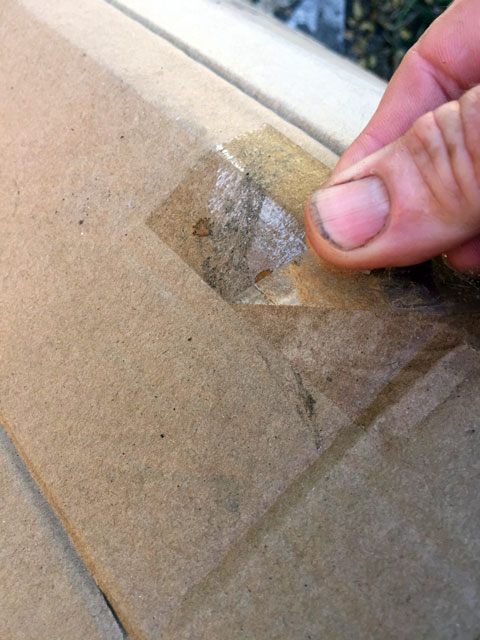
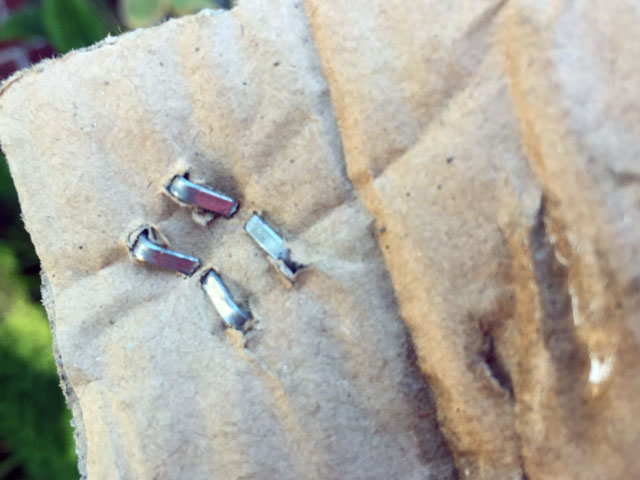
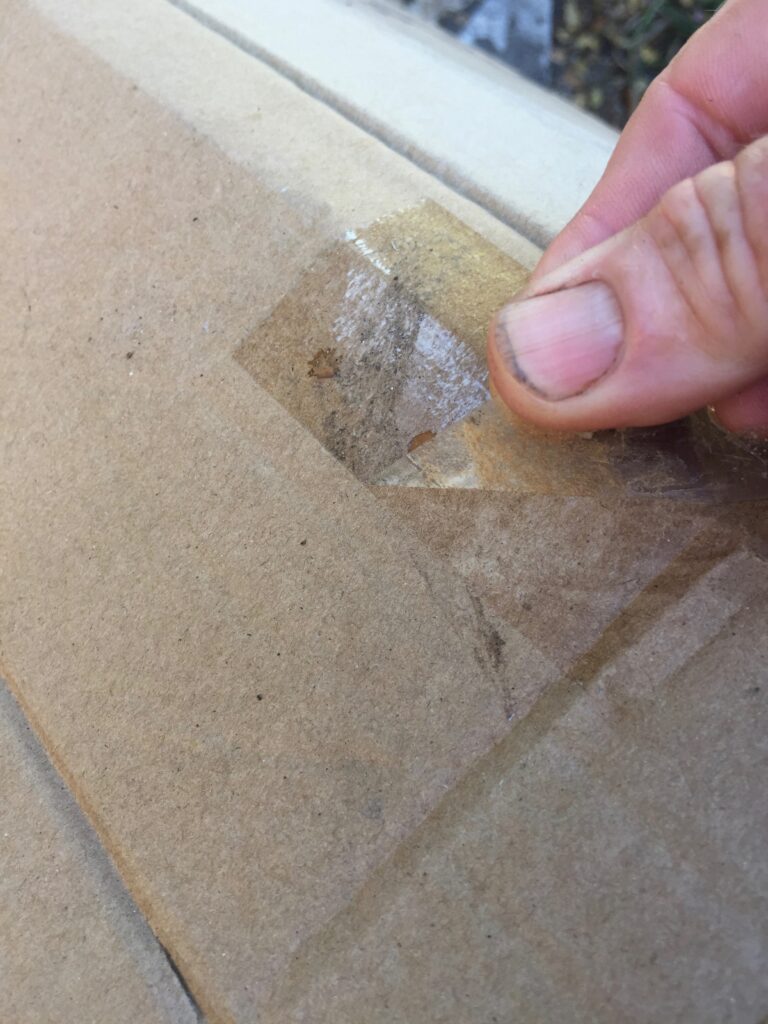
  • Remove any staples, tape or packing slips in sleeves so that the cardboard has no plastic and metal bits attached to it. You do not want to be finding long pieces of packing tape floating up through the chips over time!
  • There is cardboard that can be purchased in big rolls which may be more convenient but most scavenged cardboard is free.
  • Newspapers can be used to if put down thickly.
Take out any staples, tape or packing labels before laying down cardboard. If there is bright printing on the cardboard; face that to the ground so it is not visible.

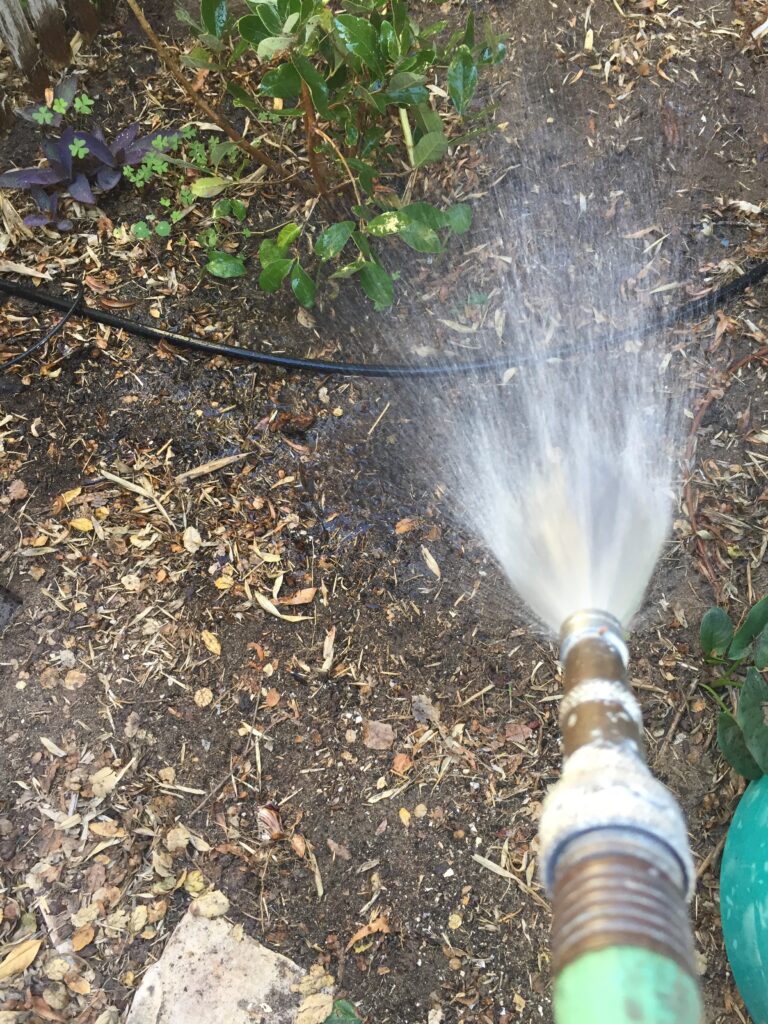
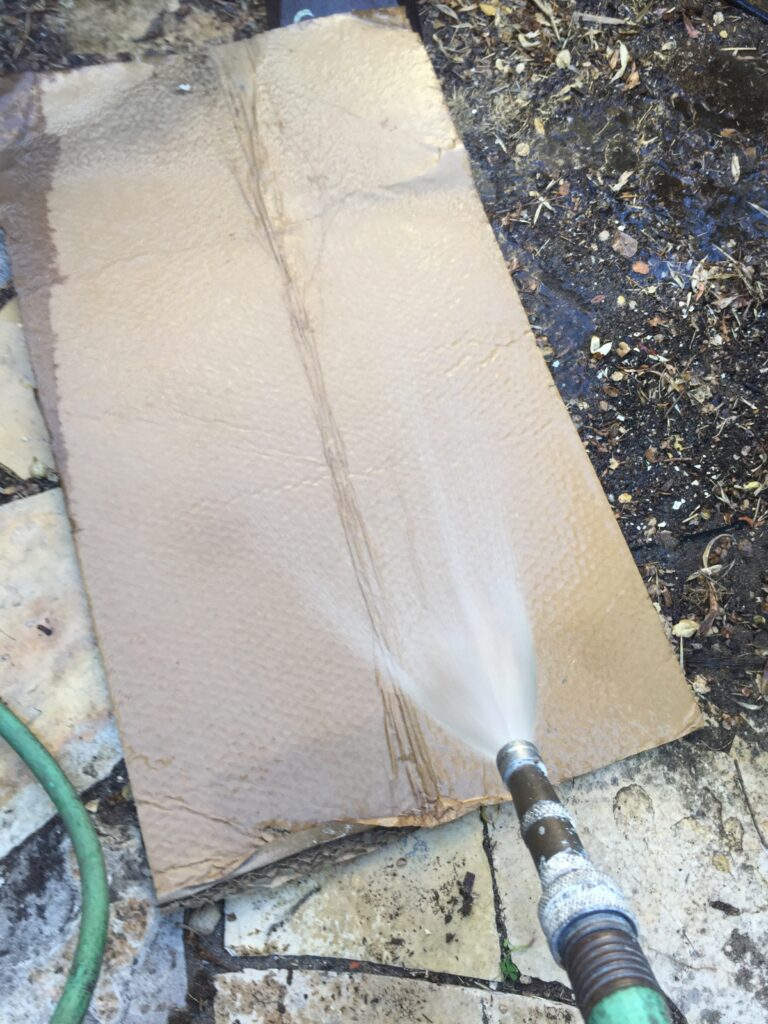
Get all surfaces wet

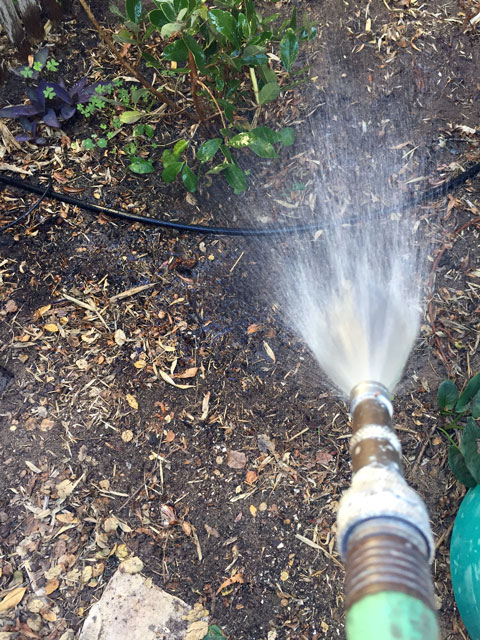
  • Wet down the soil that the cardboard will be covering.
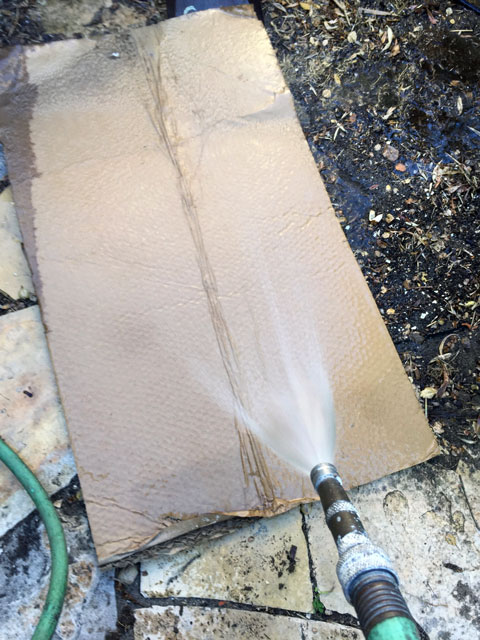
  • The cardboard should be made damp as well. This will help keep the the cardboard in place and keep edges from curling up through the mulch.
Get the ground damp! Here there were already older wood chips in place. The cardboard was laid out on top of the existing wood chips.
Cardboard should be soggy!

Laying down the cardboard

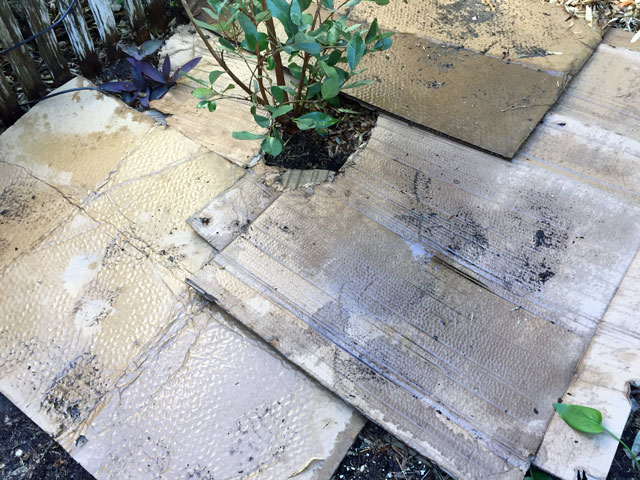
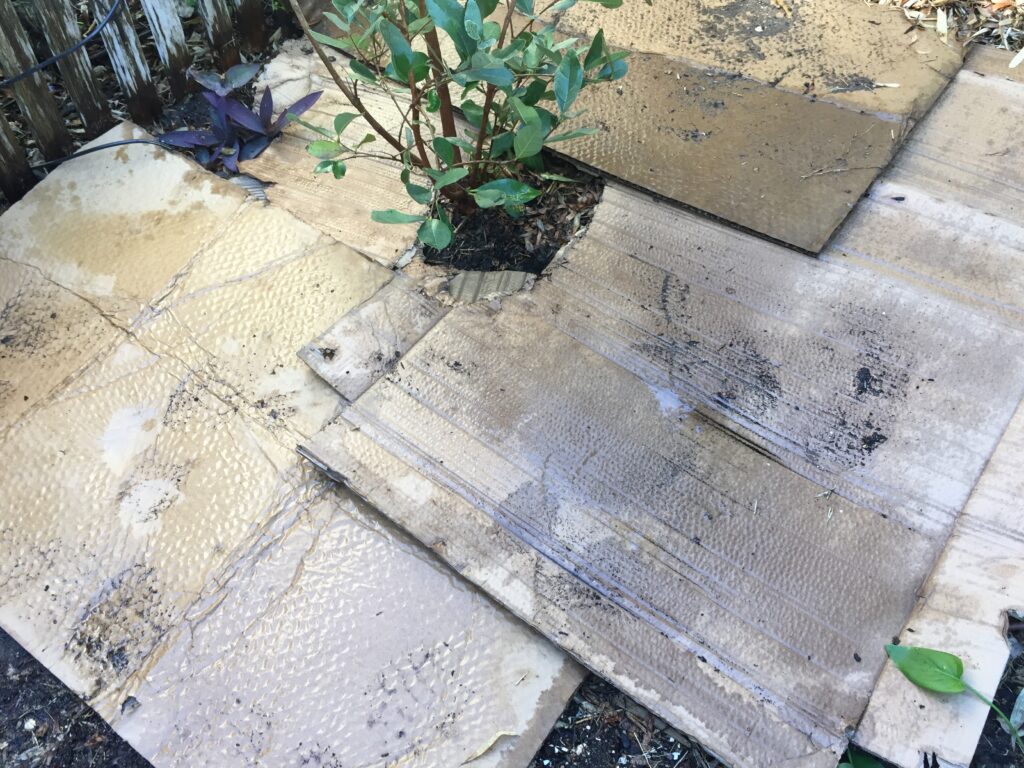
  • Cardboard should be laid down to cover the soil surface. All sheets should overlap by at least 4 inches so not surviving weeds can grow through. The cardboard stops light from reaching seeds and the plants that were covered. This generally kills most of the weeds with a few notable exceptions (oxalis, Bermuda grass, ivy, poison oak, convolvulus, and a few more very hard to kill plants).
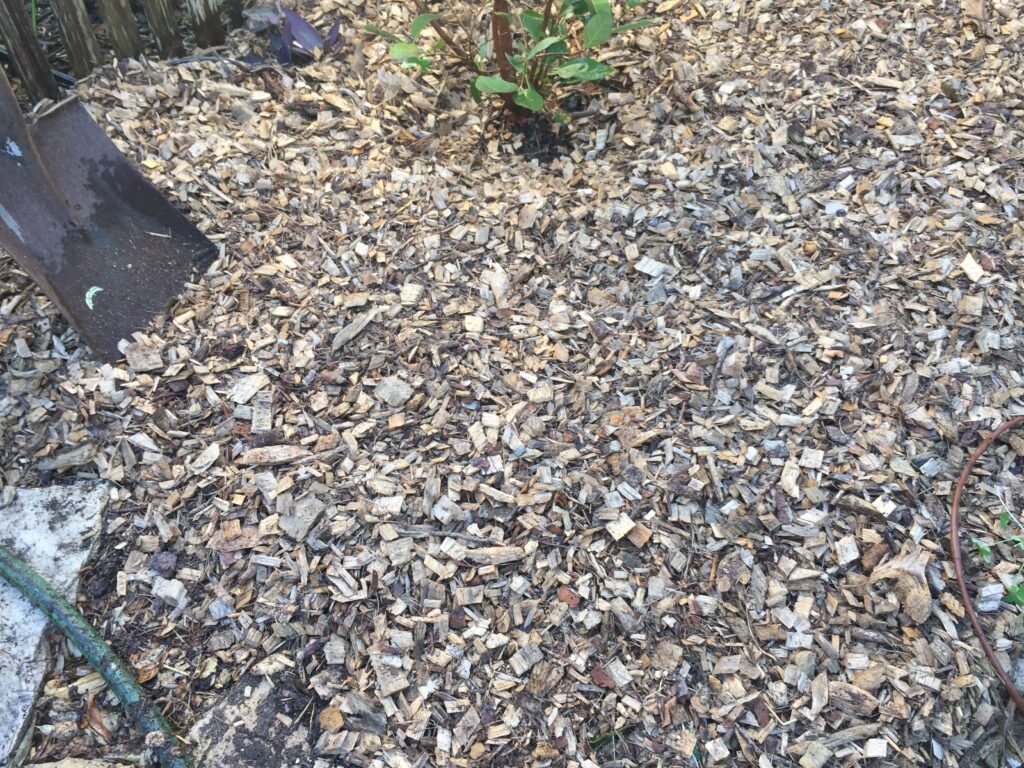
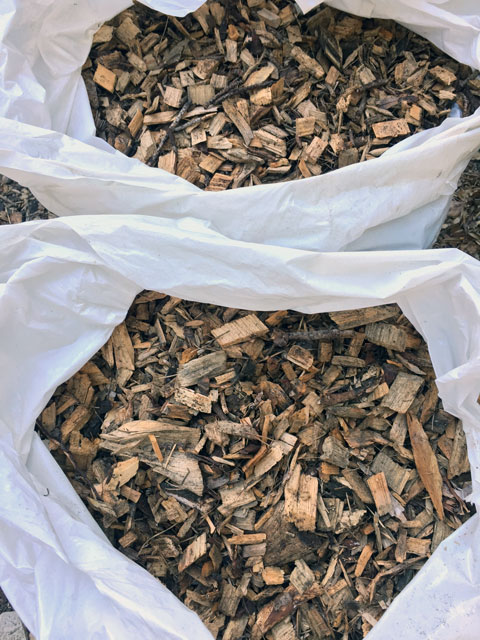
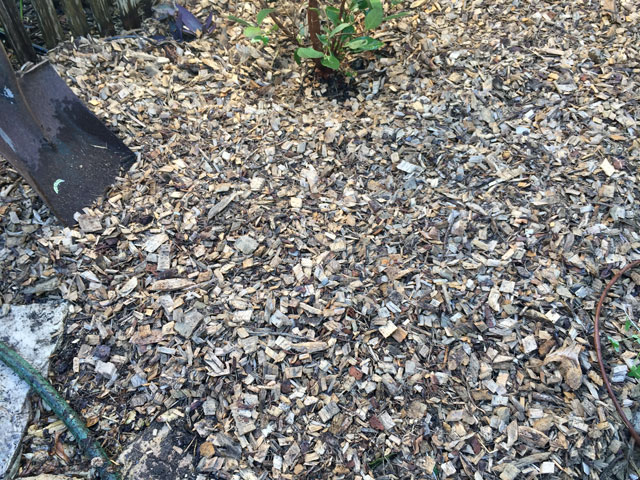
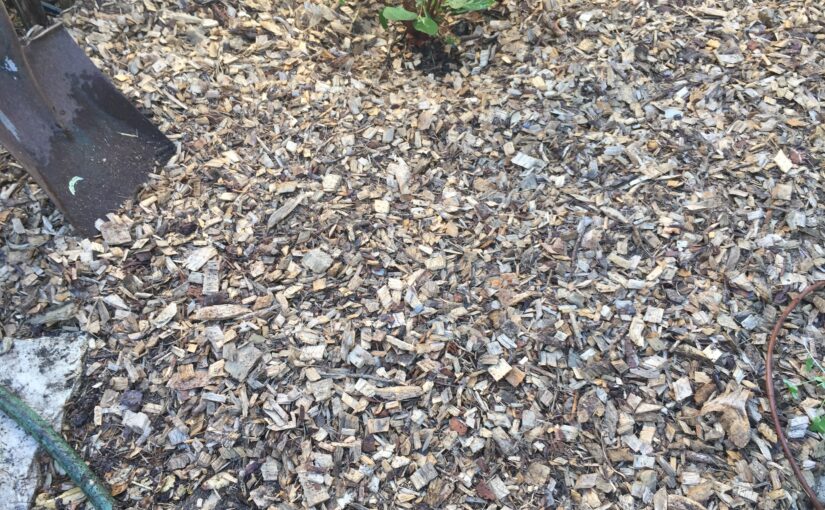
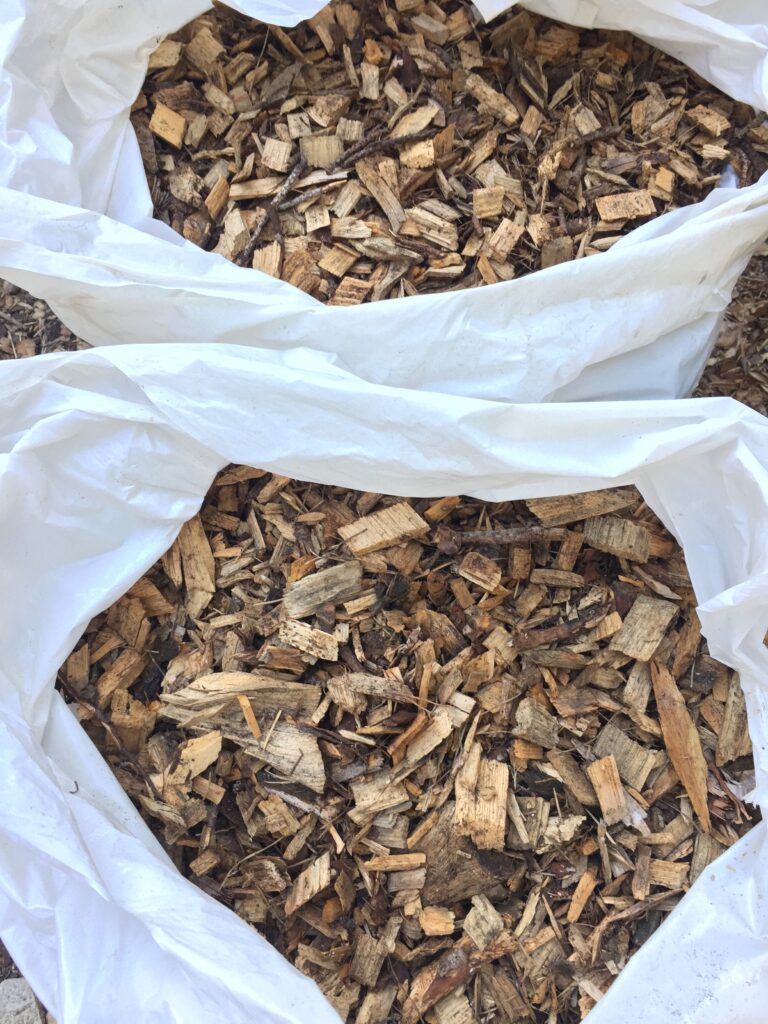
  • Wood chips are spread over the wetted cardboard at about 4-6 inches deep. Don’t skimp here or the cardboard will dry out and become visible. Not a good look!
  • Wood chips from the thickest part of the tree last the longest, but chips that have lots of leaves, needles and small branches contain more nutrients. Very green chips will break down faster and will need to be replenished sooner.
These were some very nice coastal oak and Monterey cypress chips that looked great for a very long time.

Final details

  • Make any adjustments to the chips and cardboard to get best coverage. You want at least 3-4″ of chips with no cardboard showing through.
  • If the the cardboard abuts walkways or edgings, dig out along the edge and push the cardboard down a bit. Cover with the soil removed from the edge so the cardboard does not poke up later.
Here the cardboard has been overlapped and smaller pieces used to fit around the guava that was already in place. Keep the cardboard at least 6″ from the trunk to prevent future bacterial or fungal rot issues.

Drip system considerations

  • If you are installing a drip system – lay out the tubing over the cardboard, mark where the plants will go in with emitters and then hide the 1/2″ and drip tubing with the chips.
  • If the drip is already down, cover with the cardboard but keep the emitters visible where they water existing plants. The cardboard will break down in about a year and add organic matter to the soil.
This drywall saw will easily rip through wet card board and your fingers so use caution with this tool.

When adding plants after sheet mulching

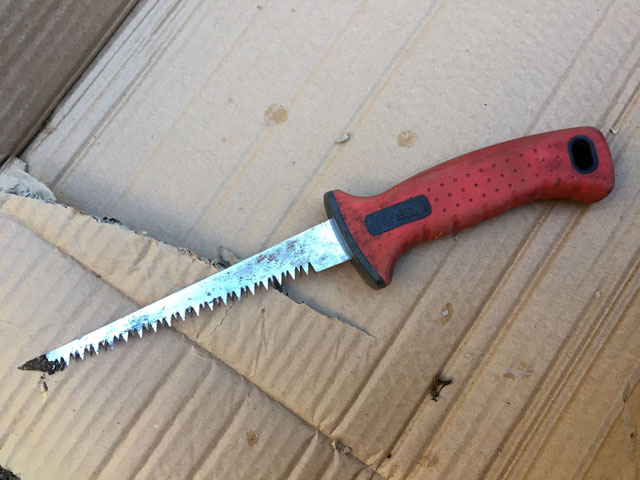
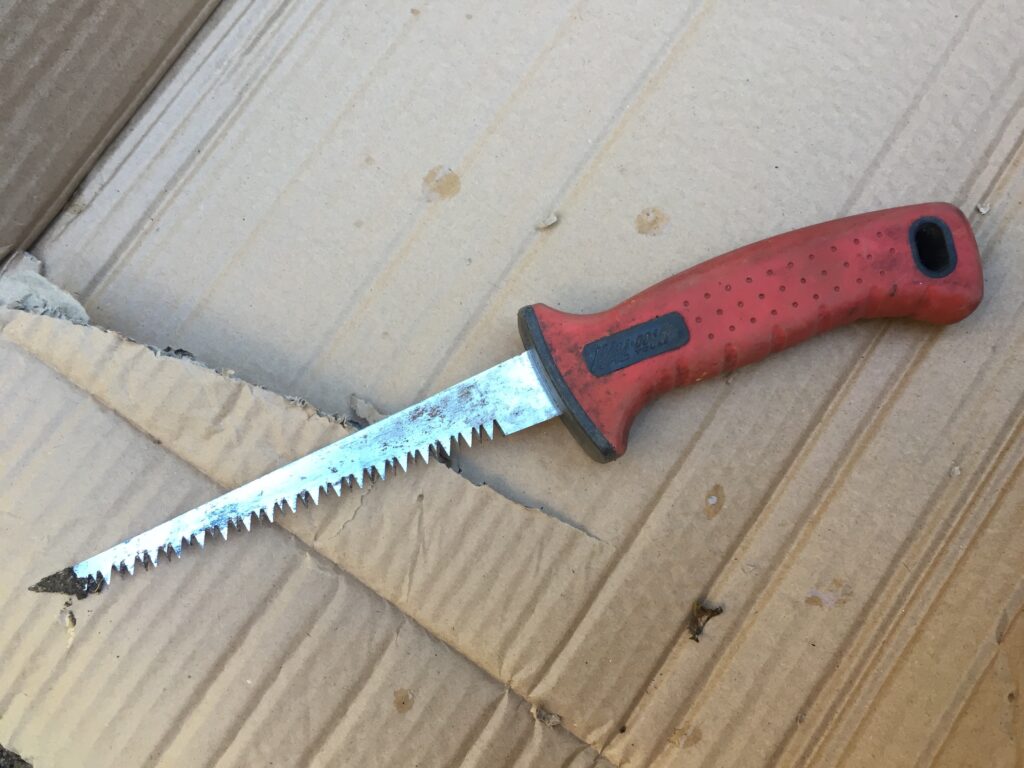
  • On a new plant installation I use a drywall keyhole saw to cut through the wet cardboard to open an area to pop plants into the ground. A box cutter (often recommended with sheet mulching) is not equal to the task in my opinion.
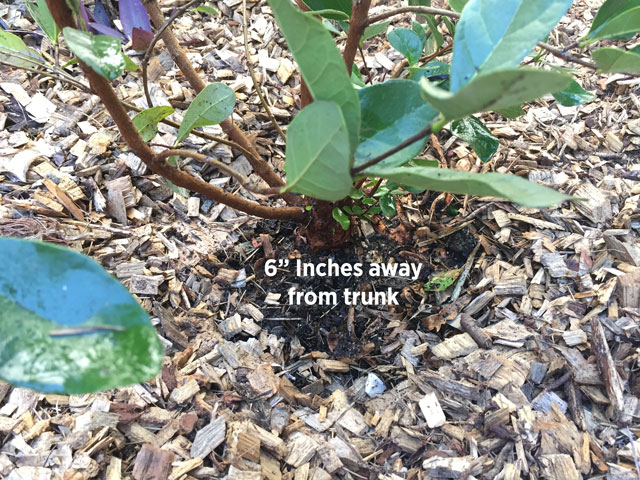
  • When planting through the chips with new plants it is best to position the plant a little higher than the soil as the chips will break down and fill in around the root zone—possibly covering the crown and causing the plant to fail.
All the weeds have been covered and deprived of light.

Small Project Sheet Mulching

Recently I removed a lot of bamboo in the front of the house. It was not getting the water it needed and the invasive yellow oxalis was beginning to move in. After clearing the bamboo and much of the oxalis, I planted a guava against the fence. Of course, as soon as the guava was watered the oxalis returned. This was a perfect opportunity to lay down some cardboard to suppress the oxalis before it set up camp in the new planting.

Collected cardboard for sheet mulching
Gathered cardboard for covering the oxalis

Usually sheet mulching is large scale and recommended for removing a lawn or preparing a new garden plot. But sheet mulching can be done a little at a time as materials are collected and time is available. It’s less of a time commitment to do small patches, but just as satisfying to put together.

Collecting cardboard is easier because only a few pieces are required – not the mass volume needed to kill a lawn. This is true of the wood chips or mulch too. A few bags will get the job done. This is a low exertion solo job; no crew required.

Here are the basic steps:

  • Prepare the area that will be sheet mulched by removing tall plants, stems, clods or other objects that will prevent the cardboard from laying flat
  • Remove tape, labels and staples from the cardboard – collapse box to lay flat
  • Wet the soil of the area where the cardboard will be installed
  • Pre-wet the cardboard – it will conform to the soil better when soggy
  • Arrange the cardboard around the planting leaving room around the base of the plant – about 6″
  • Make sure and overlap any cardboard pieces at least 4″ so that the weeds don’t grow up through the spaces in between
  • Give the cardboard another spritz of water to make sure it is laying flat
  • Cover all the cardboard with wood chips to a depth of 4″ (depending on wood chip materials – more if mostly composed of greens like leaves and pine needles)
Cardboard should have tape removed
Remove all the tape or labels from the cardboard before using
Staples should be taken out of the cardboard before use
Remove the staples with pliers – easier done when the cardboard is wet

Any labels, tape or staples should be considered contaminants and be removed in advance of installation. The tape or labels will resurface as the cardboard and wood chips break down. It is not a good look.

Two bags of wood chips were easy to pop in the trunk to bring home for this project

Wood chips can vary greatly depending on the tree source. Sometimes the chips have lots of ground up branches and leaves and it is quite light and fluffy. Branches are described as the ramial portion of the tree and carry most of the nutrients from the growing tips. Chips from branches will break down very fast and lose volume quickly. This type of wood chip should be applied with a greater depth with this loss in mind—say 4′-6″

Wood chips from the heavier trunk portions of trees are made up of woody lignins. Lignin tissue takes much longer to break down—sometimes years if sourced from hardwood. Wood chips from these sources can be applied at 4″ or less (but enough to completely cover the cardboard).

Pre-wet the ground so that the cardboard will lay flat
Pre wet the cardboard on both sides

Pre-wetting the ground and the cardboard is the defining step that makes for an aesthetically pleasing installation. Skipping the pre-wetting will create curling cardboard that pokes up rudely and ruining the installation. Wetting all after spreading is not the same effect. Don’t skip pre-wetting!

A dry wall knife is a great tool for cutting cardboard—even when wet

Most sheet mulching how-to’s recommend using a utility knife to cut the cardboard, but I find that they are inadequate for double thickness or wet cardboard. My favorite tool has been a dry wall knife that can really punch through the cardboard even when wet. Be mindful that this blade can give a wicked cut if handled carelessly!

Arrange the cardboard with 4″ overlap and cut back cardboard from the trunk 6″

Make sure that there is about 6″ of open soil around the trunk with the cardboard AND after putting down the chips. Pilling up wood chips around the trunk in a “wood chip volcano” just promotes bacterial rots and fungus by holding moisture close to the trunk and preventing air flow. Avoid causing long term problems for your trees and shrubs!

Keep wood chips 6″ away from the trunk to prevent pathogens from moving in

That is all there is to small scale sheet mulching. It is easy to extend the sheet mulching at a later time by adding new card board overlapping the old the cardboard edges. Just move the wood chips off a bit at the edge and start a new course of cardboard. More chips are added to the new areas of cardboard.

The cardboard should last about a year before breaking down into nutrients for the soil. During that time the cardboard will effectively block the light to weed seeds and prevent sprouting growth. Unlike polyester weed cloth, rain will be able to percolate into the soil through the cardboard adding seasonal moisture. It is amazing how many worms show up in a sheet mulched area!

All the cardboard is covered and creating a good barrier for weeds and seeds

In the case of oxalis, it takes several years of repeated applications of sheet mulching to really control this invasive South African bulb. Oxalis has a deep bulb that can survive years of drought. If reapplying sheet mulch and chips DO NOT RAKE BACK THE OLD WOOD CHIPS TO REUSE! This can transfer seeds from the oxalis into the new layer of wood chips. Instead, just cover the old wood chips with new cardboard and then add the new chips over the top.

Happy sheet mulching!

Compost

It all begins with the soil…

Microbes and organic matter are the foundation of all great soil. Without healthy soil microbes, most plants will fail to thrive. Without good organic matter, microbes will not be present in significant amounts to support healthy plants. It’s a loop you can improve with compost in any type of soil. With sand, added organic matter creates biotic activity, which builds humus, which creates a sponge for water and nutrients to stay at the root zone of plants. In heavy clay soils, added compost adds space between clay particles which improves aeration and drainage.

I can’t stress enough how important compost is to adding health and vitality to your garden.

A few weeks after planting the bed – lettuces, greens, onions and scarlet runner beans – all thriving.

Let it Rot

Composting is easy. It is going to rot even if you forget about it. The trick with composting is to manage—to some degree—to keep microbes active and, produce a useable product eventually. If you are vermi-composting, the trick is to keep the worms happy. Happy worms = really good worm castings to use in your garden!

If you are interested in pursuing further, there are many great books on composting and vermicomposting, and, Youtube has how-to clips on just about anything you can rot. Take a class at the Monterey Regional Waste Management District if you want a hands-on introduction on the Monterey Peninsula. www.mrwmd.org it’s FREE!

If you already compost, pat yourself on the back for returning nutrients to the soil and keeping materials out of the municipal landfill!

If you need a refresher course, or help setting up a new pile (or worm bin) in your garden, I would be happy to assist.

Save