El Bosque Garden

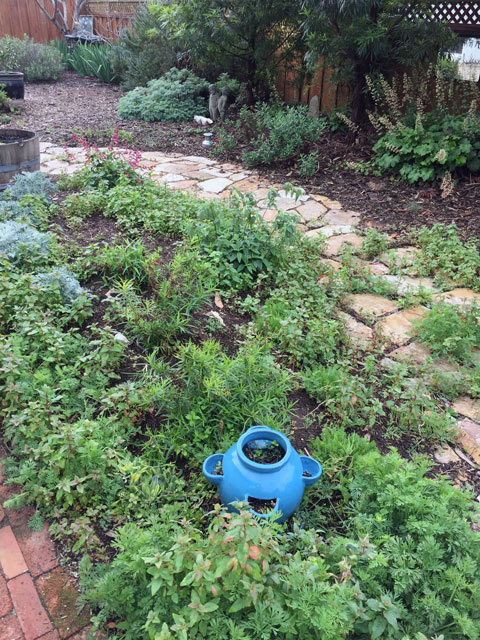
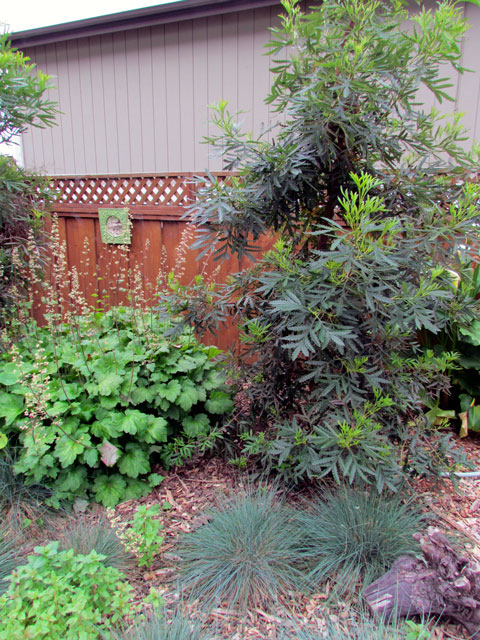
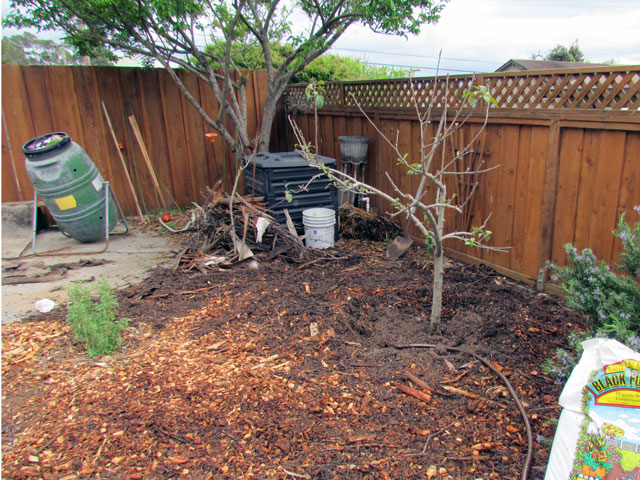
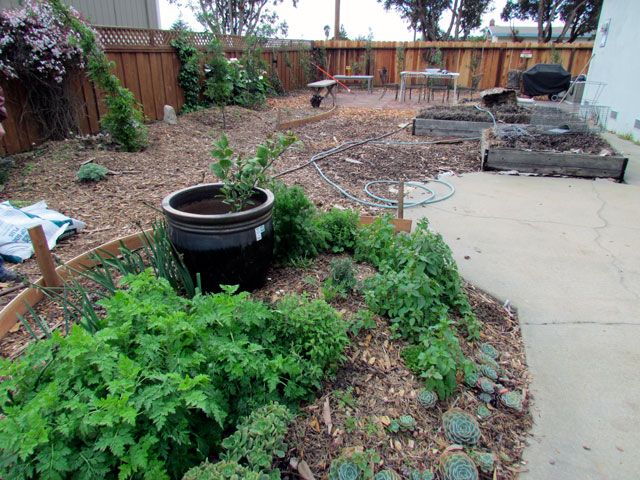
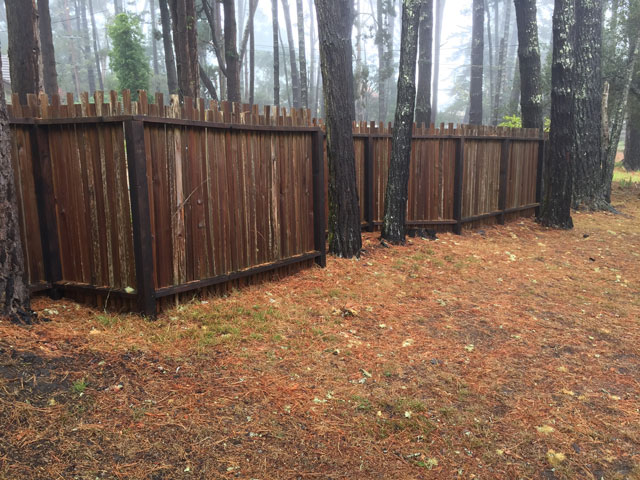
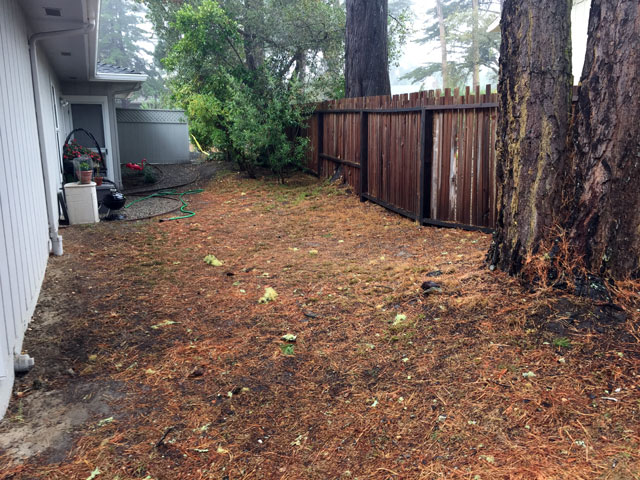
This garden held many challenges with shade and roots of mature Monterey Pines, and the browsing of free-ranging deer. Past plantings had not been entirely site appropriate nor deer resistant.

How to build a garden with shade and deer

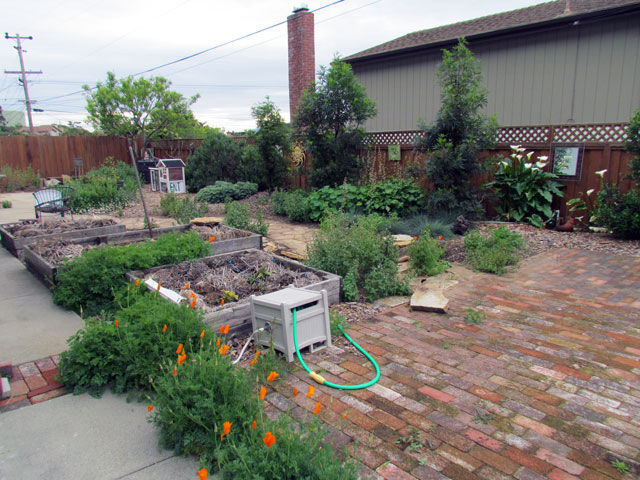
Our gardener initially wanted to refresh plantings for color that would resist deer and grow well under the pines around the front of the house. Further discussion defined a need for privacy, light blocking from a neighboring property, an enclosed area to stop deer traffic and provide a dog run close to the house.

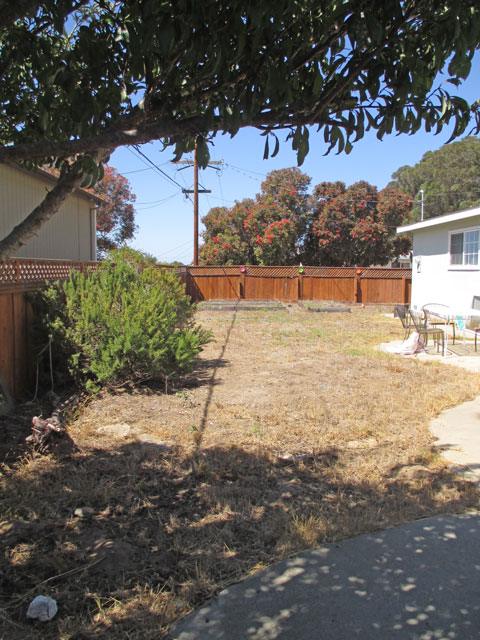
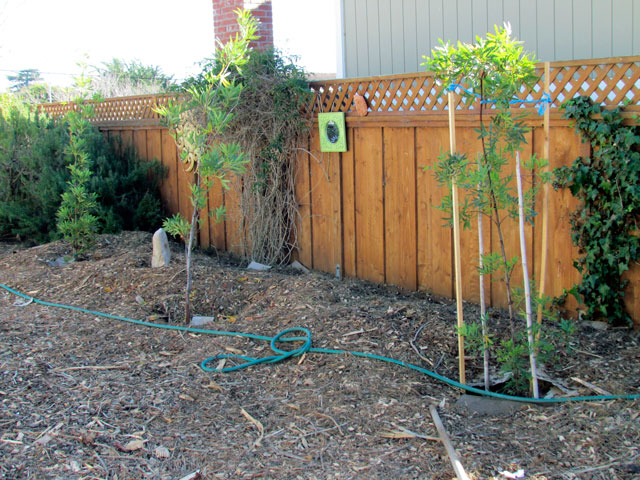
The neighbors outdoor lighting leaked through the grape stake fence on one side of the property and there was a desire to plant some sort of hedge to block out the unwanted glare. This was another challenge as the large Monterey Pines would not allow planting in the root zone where hedging would work best to solve the bright lights from next door.

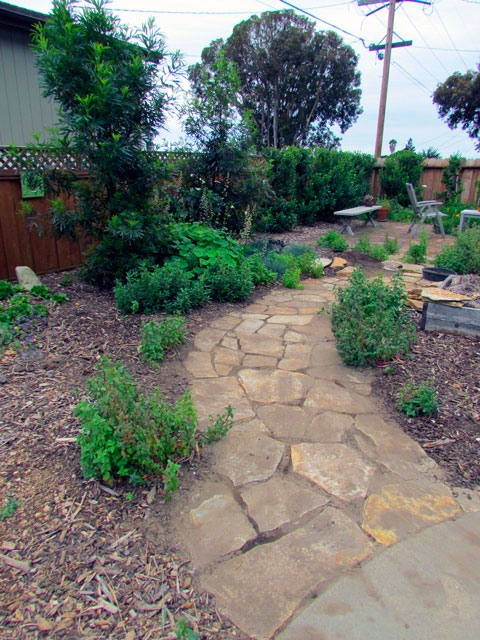
The solution for this part of the garden was to build a mound that would allow for direct planting without disturbing the roots of the pines. The plants chosen were the most deer resistant that research could determine! There are NO ABSOLUTELY DEER PROOF PLANTS! Most (but not all) were native varieties that would thrive under the pines and dappled light.
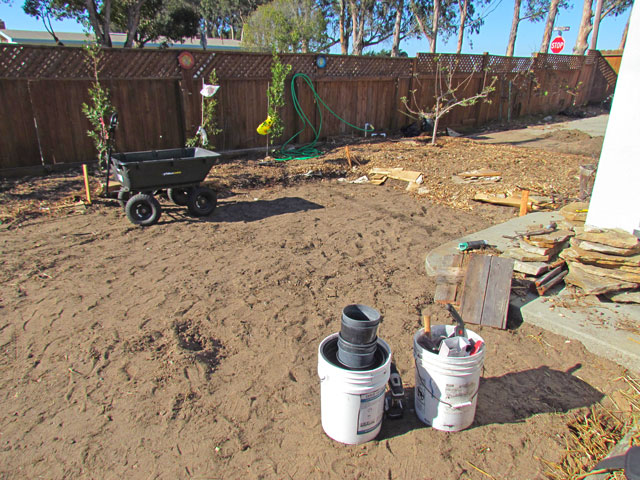
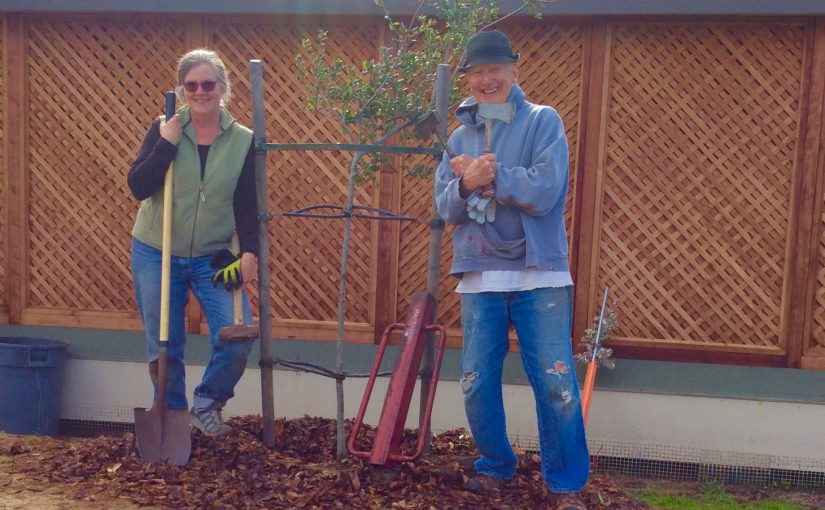
Initial concept for position of mound and required height of shrubs to block lights. No plant selections yet.

So began Phase 1

A length of rope is the quickest way to visually define where the mound would be developed

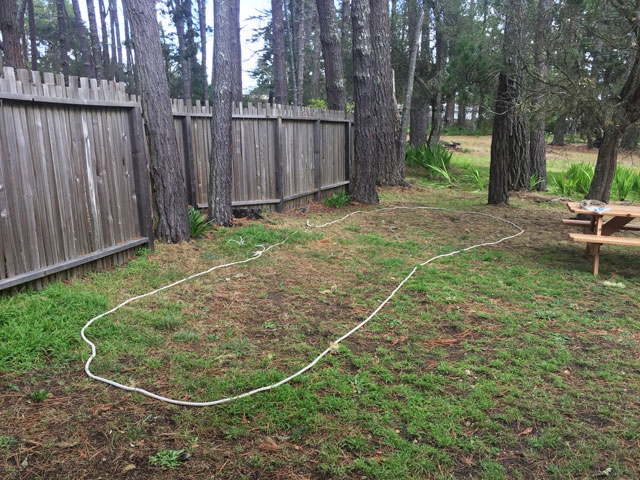
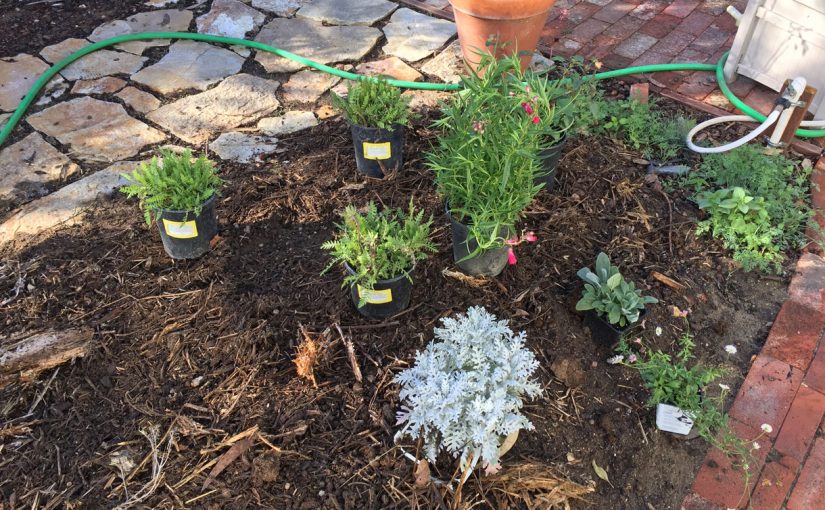
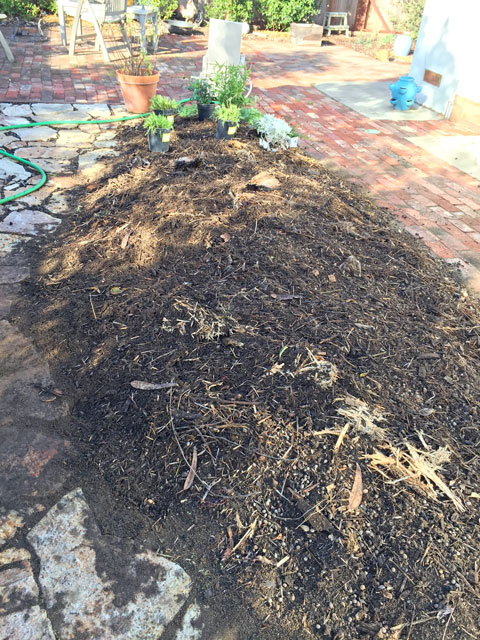
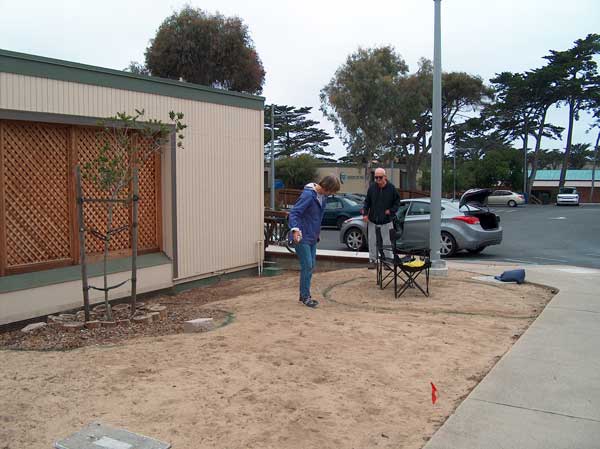
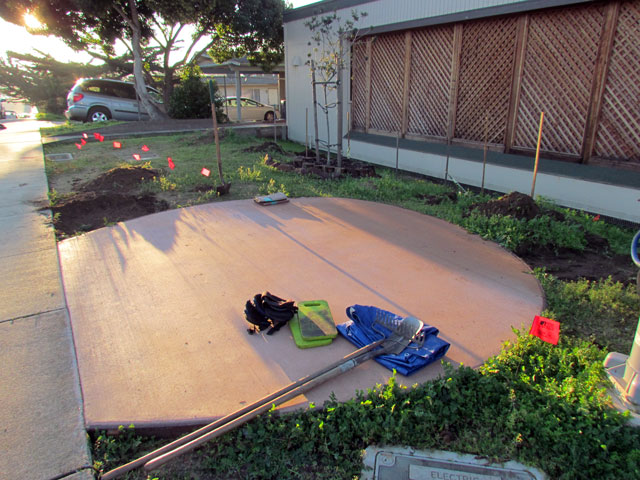
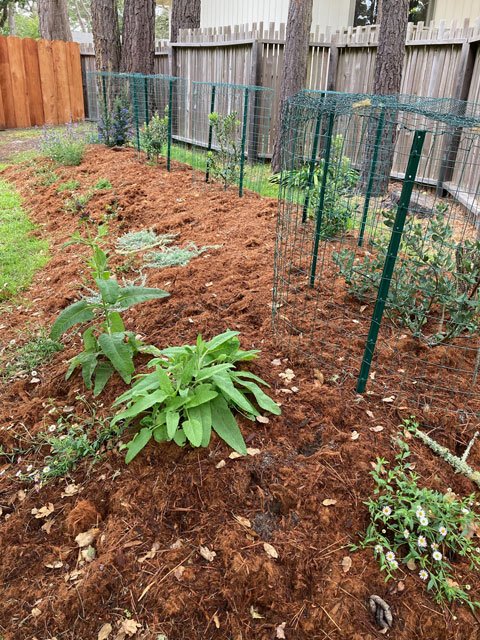
We marked out the area where a mound would be built during the day using a long piece of rope. In the evening, the client placed flags on the mound where a shrub would best block the lights. This information helped refine the final shape and position of the mound before the soil was ordered. A second benefit of using a rope is using the length to calculate the final area to order soil. We got a topsoil mix with extra compost added to make the mound.

Flags were used to mark where plants would be best positioned to block the neighbors lights
This is the view of the open deer passage past the house where the future fence and gate would be built

Mounds are a great way to provide drainage for heavy soils and many native plants are not keen on soggy feet such as ceanothus. No holes were dug into the root zone of the pine trees and the mound was kept well away from the trunk of the trees. Cardboard was laid down in preparation of the soil and would keep hungry tree roots at bay for the first year while shrubs became established.

Mound in place before irrigation was added by the crew

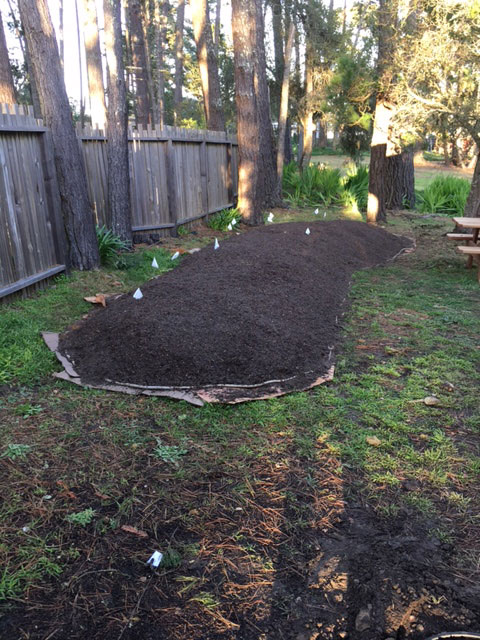
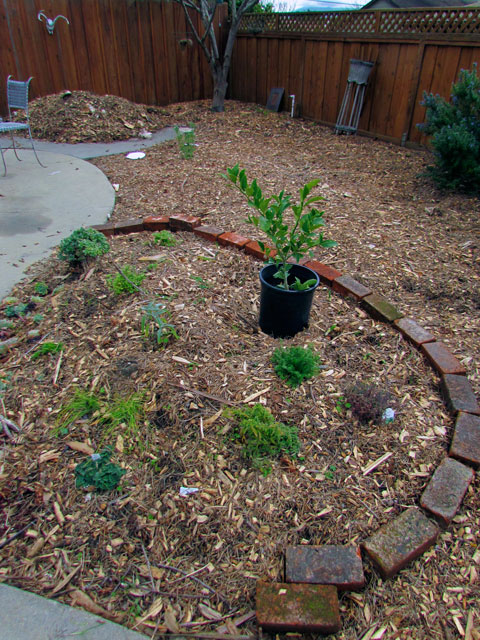
Another bonus of the mound is that it raises the plants up by 12″-18″ and increases the height of the growing shrubs from the very beginning. The raised contour will help direct rain towards the end of the property and adds visual interest to an otherwise very flat area.

Planting day! Super easy with no roots in the way.

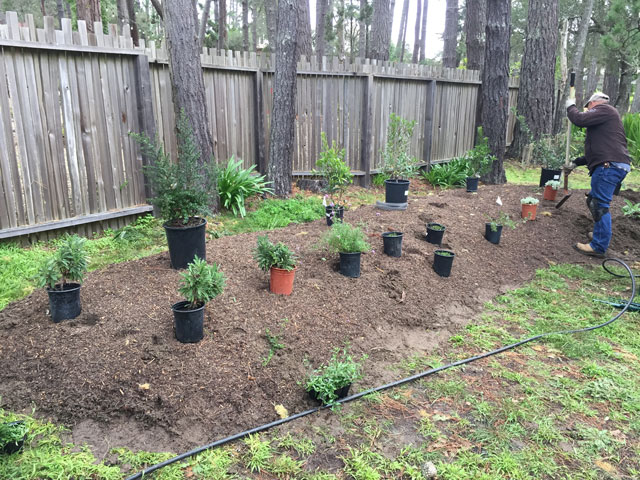
All of the plants were covered with mesh or cages to prevent snacking by deer before the roots got established. All of the plants were planted with gopher baskets as there were gopher mounds noted in the back area. This was just simple insurance that everything would get the best start possible for the first year.

We covered all of the new plantings with mesh and cages in case deer tugged plants out of the ground before roots grew. Oh yeah… and gopher baskets!

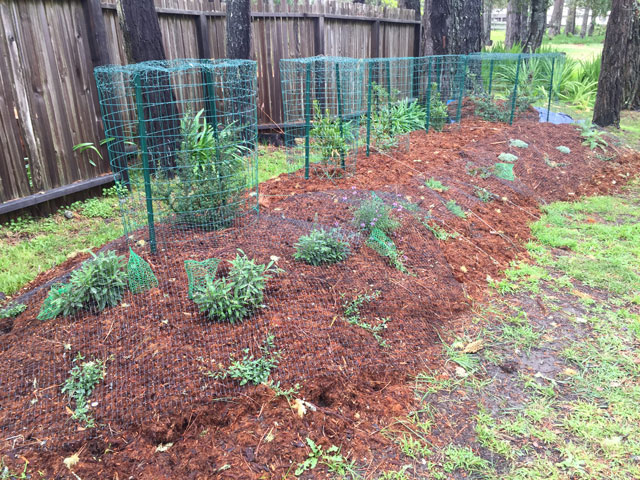
It was a gift that the regular garden service (that the client employs for general maintenance) was willing to work with the new plan to build a mound and install drip for the new plants. They put down the spaghetti tubing with emitters after all was planted. The gorilla hair mulch capper hid all of the hardware underneath.

Looking back towards the house were the deer often cut through to the road out front

I did get feedback from the crew that they don’t like the gorilla hair for maintenance because it holds on to the pine needle drop and make the use of a blower problematic. I have a preference for using—especially around ferns—as it really holds moisture, weeds can’t get into as easily and it sticks to the mound. We will see what the long term results are about using this over wood chips on the mound.

Is anything Deer Proof?

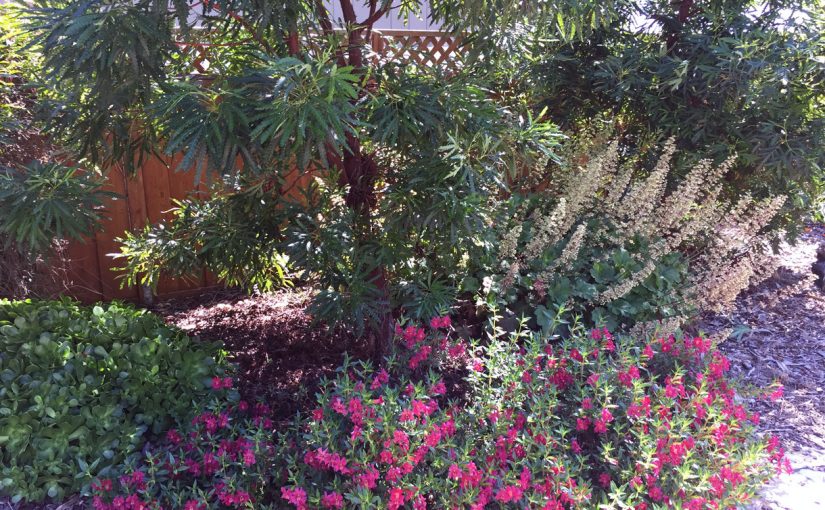
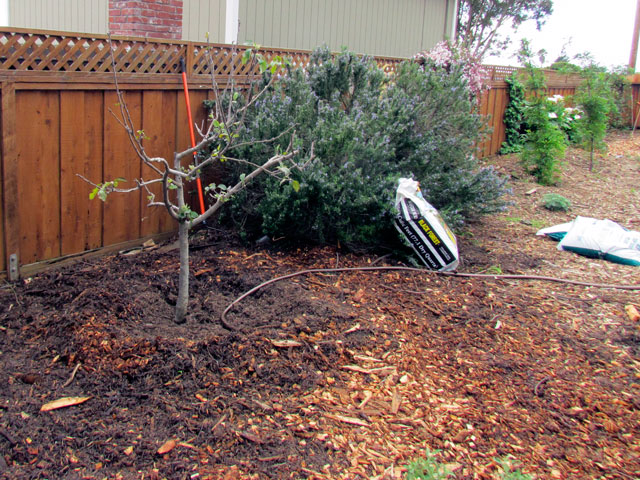
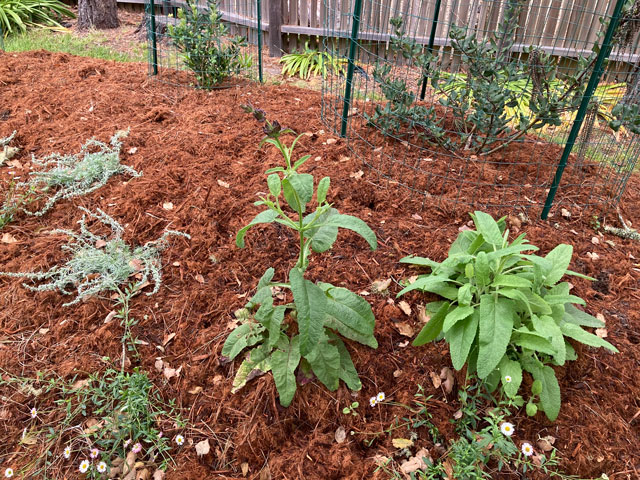
We selected Pacific Wax Myrtle (Myrica californica) for the main light blocking section of the mound with a ‘Julia Phelps’ ceanothus on one end for color, and, a California Silk Tassel (Garrya eliptica ‘James Roof’) for show on the other end. A low growing manzanita (Arctostaphyllos ‘John Dourley’) was chosen for the central section to blot out light below the Pacific Wax Myrtles. Artemesia ‘David’s Choice’, Salvia ‘Dara’s Choice’, Salvia spathecea, and Santa Barbara Daisy (Erigeron karvinskianus) were chosen as they are generally unpalatable to deer. Verbena Lilacina ‘Paseo Rancho’, is a California native that is becoming very popular in the trade and has a long bloom period. There is some evidence that deer are less likely to eat, as well as the smaller leaved ceanothus varieties (‘Julia Phelps’ in this case).

This is several months after planting and the ‘Dara’s Choice’ really took off

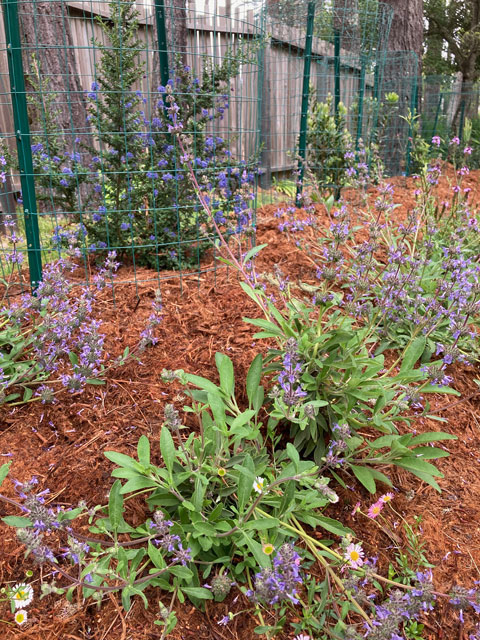
There were a few snips missing from the Lilacina last time I visited so there was a tasting after we took the netting off in May. Time will tell about desirability, as hungry deer will try anything once, and, well watered plants are especially attractive to deer during a drought.

Another salvia—S. spathacea or hummingbird sage—spread out quickly

Just to recap, the mound building and early planting happened in January and February catching the end of the very poor rains this year. Most California natives should be installed by November and into winter to gain root growth before the dry season hits. This was a classic year in which having a drip really helped get everything off to a good start. Hand watering would have been more work with perhaps not as good results (depending on dedication to watering).

The new fence and gate are visible in the background that now prevents the deer from walking past the house. The deer have not jumped this fence as they cannot see where they will land. And the owner has a dog.

So did the mound solve the lighting problem? Yes and no. Although the height of the mound and the rapid growth have done some good in minimizing the light it will be another year before the Pacific Wax Myrtles get wide and thick enough to really block the light. They can potentially grow 3 feet a year in good culture conditions (which looks like they will). We talked about hanging cloth to block light on the backs of the cages in the interim but patience may be the key here.

Beach Garden Part 3

Planting a Pollinator Mound

After the second year of the garden, the old wooden raised beds were falling apart and the owner wanted a perennial solution that would be attractive year round and feed pollinators. Although having a spot to plant food had been originally desired, the upkeep was not in alignment with an increasingly busy schedule.

Paved patio area
Raised wooden beds on the left were useful for a few more seasons, but it was time to swap with something more attractive.

The sidewalk along the house was very narrow and the owner had leftover brick added to widen the path against the house. This left a central area of soil about 14 feet long and 4 feet wide that could be planted with low care perennials.

Prepared mound of soil for planting
Soil moved from the added brick path strip (visible to the right) was used to build a mound prepped with lots of added compost and aged manure.

The plants needed to be perennials with low water and maintenance needs and offer lots of nectar and pollen in long overlapping seasons. The colors needed to be harmonious and blend with the other plantings already growing in the garden. Although the rest of the garden has many native California plants we decided that this spot could be a looser mix of perennials to feed a broader list of pollinators.

Raised mound for pollinator garden
The mound had a few weeks to “age” in all the added amendments before planting began

The pollinator plant list was refined down to:

  • Achillea filipendulina – ‘Gold Plate’ Yarrow
  • Erigeron karvinskianus – Santa Barbara daisy
  • Festuca glauca – Elijah Blue Fescue
  • Lavendula augustifolia ‘Hidcote’
  • Penstemon ‘Garnet’
  • Rosa mutabilis – Butterfly Rose
  • Salvia ‘Wendy’s Wish’
  • Salvia ‘Waverly’
  • Senecio cinneraria – Dusty Miller
  • Stachys byzantina – Lamb’s Ears
  • Packet of California native wildflowers seeds sprinkled across the mound

Oak barrel ready for planting
Half oak barrel was added for a small spot to plant edibles in February

The yarrow, dusty miller and Santa Barbara daisy are attractive to butterflies and syrphid flies, while the tube flowers like the penstemon and salvias attract hummers and night moths. The small lavender and butterfly rose feed native and domesticated bees. The fescue is not a pollinator plant, but there needed to be some repeating  texture and blue color to tie in the other areas of the garden. All were planted in the fall well before the winter solstice and have had ample water from the generous rain this year (2018-19). The fall is the best time to plant a perennial garden on the Central Coast. Ditto for broadcasting native wildflowers before the rains start.

Planted mound begins to fill in
By March the wild flower seeds have filled in between the perennials

Pollinator mound
A few more weeks in to April but the wildflowers have not yet begun to bloom

The final plant for the mound was to be a Rosa chinensis ‘mutabilis’ but it proved to be elusive in the local and bay area nurseries. Multiple calls to various nurseries beginning in October could not source the plant in the pot. Annie’s Annuals on-line had listed but not available for ship. I took cuttings in April having lost faith with the nurseries. This is a common problem in the trade. Trends change and beautiful plants become unavailable because no one is growing for this season. This is where a little skill with propagation can provide plants that might be a hard to locate if there is parent stock available.

If you are not familiar with it, the butterfly rose is a very hardy and delightfully colored rose that begins as a yellow bud, opens to pink and deepens to rose red before the petals fall off. It is one of the EarthKind® Texas A&M. This coloration will play off of the yellow yarrow, the magentas in the penstemon and ‘Wendy’s Wish’ salvia. Blue purple ‘Waverly’ salvia and deep blue ‘Hidcote’ lavender will contrast with the yellows and support the magenta colors. The plants with silver/gray foliage add interest when not blooming. So far, the ‘Wendy’s Wish’ has been reliably blooming since we planted it, but still waiting on the spring show for the rest of the mound.

Save

Save

Save

Save

Save

Save

Save

Save

Save

Beach Garden Part 2

Spring comes and changes everything in the garden!

This garden really began to evolve after the good winter rains of 2017-18. In the first year most of the large shrub and tree plantings were installed in the fall and winter. This gave all of the plantings the benefit of good root growth before the spring. We also threw down some wildflower seeds that got entirely out of control—in a good way.

The rock path was laid down mid spring/early summer. It connected the patio to the house and gave the garden a non linear flow. During the sheet mulching phase, we discovered lots of pavers buried around the yard from a previous owners use. This was a significant bonus as there was a LOT of stone material that would have been costly to purchase and much work to move on site. This path was built over several weeks an afternoon at a time using the found pavers.

Paver garden pathway
After tamping the sand to make a solid base, the meditative piecework began

Paver path in progress
Numerous California Poppies and Red Ribbons from the wildflower seed packet needed to be pulled up to lay down the pavers. A few plants remain on the edges to reseed for the next year.

The photo below shows how fast the Catalina Ironwoods grew in one year and  blocked the neighboring wall as desired. Understory plantings included the native Huecheras, Sticky Monkey and blue fescues. We did not gopher basket the grasses and the gophers ate ALL of them over the summer. Lesson learnedput everything gophers find tasty in baskets.

Catalina Ironwoods
The Catalina Ironwoods exceeded all expectations for growth, hardiness and beauty

Sticky Monkey flower
Native Sticky Monkey flower can take partial shade conditions and paired well with the Ironwoods, Heucheras and Blue fescue

The path firmly connected the house to the patio and invited exploration. The backbone shrubs such as the Italian buck thorns along the windy edge were filling in and were topped to keep to fence height and promote more side growth. An Italian buck thorn can grow over a foot a year and will top out at about 20 feet if left un-pruned. They are very drought tolerant once established and make an excellent dense privacy screen.

Paved patio area
Most of the larger features were completed within the first year. The straw bale garden boxes served for the first year but were removed eventually to create a pollinator garden

On the dry side yard, by the street access gate (where the small apple tree had been originally) we planted a California Flannel bush (Fremontodendron californicum). It will grow to 25′ if not trimmed and will make a lovely yellow flowering focal point viewed from the patio that requires no summer water. A note of caution: this shrub has fuzzy irritating hairs (hence the “flannel bush” name) and pruning without eye and skin protection is not advised. The flannel bush is best planted away from points of close contact and should be given plenty of room! In the photo below, the flannel bush has already doubled in size from the original 5 gallon pot.

side yard with fremontodendron
View of the side yard with Italian buck thorn hedge (along fence), Fremontodendron, California buckwheat, blue fescue and poppies

Gardens are always evolving. The sweet spot is to accept and enjoy the changes that develop over time knowing that there will be MANY singular moments when the garden is “perfect”. Yes, the gophers ate the blue fescue, but they were replanted the next fall with economical 6-pacs using wire baskets. The gophers come for the California poppies, but there are many to share

Up next: the Pollinator garden mound


Save

Save

Save

Save

Save

Save

Save

Save

Beach Garden Part 1

Sometimes a slowly developing garden project can be very satisfying – even when it is spread out over several seasons.

Davis yard "Before"
This yard had a lawn at one point in time but little else of interest to call it a garden

Year One

Margaret’s garden began with a desire to create outdoor space for entertaining and play area for a new grandchild with the blank slate of her yard. There had been an era of lawn—long dead—with only the bones of the sprinkler system and the trashy green turf netting peeking out of the weedy sandy soil. A strata of redwood bark and some rotting wooden garden beds indicated another era of discarded use. There was a single healthy Santa Rosa plum, an unknown apple, a monster rosemary bush and some climate inappropriate grapevines. But overall, the lot was devoid of structure or plantings and we could dream a new garden with little impediment.

Davis yard "Before"
The neighbor’s garage and free standing fireplace dominated the space and necessitated a screening solution

We worked up a list of desired outcomes for the new garden. They included privacy, wind screening, herb area and vegetable bed, a patio seating area, low maintenance and drought tolerant pollinator and native plantings, and, view screening of the neighbor’s two story monolithic garage wall and free standing chimney that dominated the yard.

Make a use plan of the site
Even a rough sketch of features and use of space will help make decisions on the larger elements such as a patio and walkway

The first order of business was replacing the decaying old fence. Because there was a need to move a large shed on site, the new fence included access to the side street with a large sliding gate. This greatly simplified bringing in wood chips and bricks for later portions of the installation.

Preping for the brick patio
New fence with rolling gate access, freshly planted buck thorn hedge and future brick patio area. Note little apple tree top right.

After a few months when the fence was finally secure, sheet mulching began for the entire sandy lot. If you are not familiar with sheet mulching to remove lawn, control weeds and improve soils, visit this link here. Cardboard was laid down onto the moistened sandy soil. The cardboard was then wetted down and covered with a very thick layer of free wood chips dropped off by a local tree service. That side gate came in handy yet again! The backbone Italian buck thorn hedges were planted during the sheet mulch phase around the perimeter of the fence to eventually soften the line of the fence, provide further screening and slow the prevailing wind.

Consideration was given to watering zones and it was decided that the side yard would have native plants that would be eventually left to their own with no dry season water. So the little apple tree had to be moved around to the other side of the house to an area where watering would occur. In this case next to the existing happy plum tree and compost area. The tree was moved in late January during its dormancy (as much dormancy as you can get on the central coast anyway). Pre-treatment included deep watering and cutting around the root ball with a shovel following the drip line of the tree. This gives the roots a few weeks to grow new roots closer to the tree before excavating. The root ball was carefully dug out and wrapped with a ground cloth to drag it around to the new location. Lots of good Black Forest compost soil amendment was added to the soil when replanting and finished off with another deep watering. Not only did the tree recover admirably that spring but produced a nice handful of apples as thanks in the fall.

Apple Tree
The apple tree made the move while still dormant in January. Newly planted Catalina Ironwoods visible top right

Apple tree replanted
Apple tree successfully in place next to the plum tree and composting area

To create a softer view from the house, three native California Channel Islands Catalina Ironwoods (lyonothamnus floribundus) were planted in a mound. Their beautiful shaggy bark and ferny foliage will be a much improved view shed over the great expanse of painted 2-story wall!

Catalina Ironwood
Catalina Ironwood saplings will grow quickly to block the neighbors monolithic wall and need little care over time

For convenience to the kitchen, the herb mound was built with extra soil moved from the patio installation and plenty of additional compost. Herbs such as thyme, oregano, marjoram and chives were planted in the mound. Succulents and Santa Barbara daisies were added around the edges along with daffodil bulbs for seasonal color. A Meyer lemon now lives in a pot and will eventually be planted into the mound. This was a way of testing if the lemon liked this location without committing entirely.

Planting the herb mound
Outline of new herb mound accessible from the kitchen with new lemon tree just after the sheet mulching was finished

The patio area was a whirlwind one weekend work party effort by the owner’s family. With lots of hands, bricks and a good bit of know how from Margaret’s brother this DIY project turned out solid. They now have a place to gather outside with a free standing fire pit, seating and a barbecue. They can congratulate themselves on family bonding and a good job accomplished.

Completed Brick Patio
New brick patio started with materials sourced on Craig’s list and was installed as a family project

Herb mound with lemon tree
A few months after planting the herb mound—the feverfew took over the mound that summer

The 3 wooden beds from the previous tenant were re-purposed for another year. We moved them next to the house and filled with rotting straw bales (visible top right in image above). That summer had some fantastic tomatoes that sprawled beyond the beds and provided tomatoes into November. A year later, this feature was replaced by a more formal landscaped mound (see next post).

Save

Save

Save

Save

Save

Save

Save

Save

Save

Save

Save

Save

Save

Save

Save

Save

Save

Save

Save

Save

Save

Save

Save

Hillcrest Garden

This was a Marina Tree and Garden Club sponsored project that came about with the collaborative dynamism of Grace Silva-Santella, myself and a lot of community volunteers. Grace and I worked to design, budget and project manage the installation of this public space next to the Marina Chamber of Commerce on Hillcrest Avenue. What follows is the April 15, 2017 dedication speech and story of how the garden came into being.

Are any of you familiar with the children’s book If You Give a Mouse a Cookie? Then you know that the next line is “He is going to want a glass of milk.” This garden really is that story. It all began when Candy Owen-Meyers planted the seed to Mike Owen, that it would be a fine gesture to plant an oak tree in memory of former city council member Ken Gray. With the city’s blessing, the tree was purchased and planted by the club in the bare patch next to the Council Chambers. But the tree looked lonely. We discussed adding a nice durable bench, so people could sit under the tree to admire it. Under Mike’s lead, an unexpected outpouring of community donations made purchasing the bench a swift reality.

deciding where to put the concrete pad
Grace and Mike mark out the location for the new concrete pad

But, clearly, the memorial bench could not just sit in the dirt under the tree. With the playground across the street under renovation, the city offered to add a concrete pad for the bench if the club would map out the size and location desired. Not only did Ed Meachum and the public works crew honor our vision—they exceeded expectations and made a beautiful colored pad for the bench.

Completed tinted concrete pad ready for the next phase
With the concrete pad in place, the site was ready for contouring, building the rock wall and positioning the seating rocks

After the concrete was poured, it became incredibly obvious that this space needed more than a tree, a bench and some tinted concrete. It was an underwhelming public space that never got a second glance. The thought blossomed – Why not build a garden that invited lingering and conversation outside of council chambers? A green space where one could enjoy Ken’s bench and the tree? A welcoming respite near community services and the neighborhood playground. Why not dream big and feature beautiful low care California plants that would provide habitat for birds and pollinators too? Then we heard about a grant through the Monterey Peninsula Regional Parks District program (Open Space and Coastal Preservation Grant Program). So fortified with a plan, a budget, a well researched plant list and a proposal, Grace and I miraculously obtained a grant from the MPRPD.

With funds secured, the garden began to organically take shape with the steady help of many volunteers. Three large rocks were selected for seating around the bench and to encourage gathering. Grace and I imagined the delight of small children jumping on those smooth rocks while parents rested on the bench. The curve of the moss rock wall gracefully defined new planting levels. A mound was added for contour and interest with the extra soil on the site. Paver stones were laid to connect the sidewalk to the bench area and welcome entrance into the garden. Sheet mulching, wood chipping and planting soon followed. On a very cold and long Saturday in February, our dedicated volunteers saw the garden come to life. Strong hands gathered to carefully assemble the drip system to each and every new plant. Public Works installed programable irrigation valves to provide reliable, measured water for the new garden.

The hardscape for the garden begins to define the space
Ray Santella works on the fine details paver installation next the the new rock wall

This garden was built by the power of community. I want to thank the Monterey Peninsula Regional Parks District for providing the milk to go along with the cookie. Thanks to Layne Long for his enthusiastic support of this project from the very beginning. Special recognition goes out to Ed Meachum and the public Works crews who tolerated and satisfied our many demands with good cheer and can-do attitude. Thanks go out to the Monterey Regional Waste Management District for donating an enormous mound of compost, and, to Smith Tree Service for it’s wood chips. Thank you’s go to all of the generous donors that contributed to the memorial bench. And finally to all of the amazing community volunteers – Thank you for your spirit, enthusiasm and hard work. Cookies, anyone?

Save

Save

Save

Save

Save