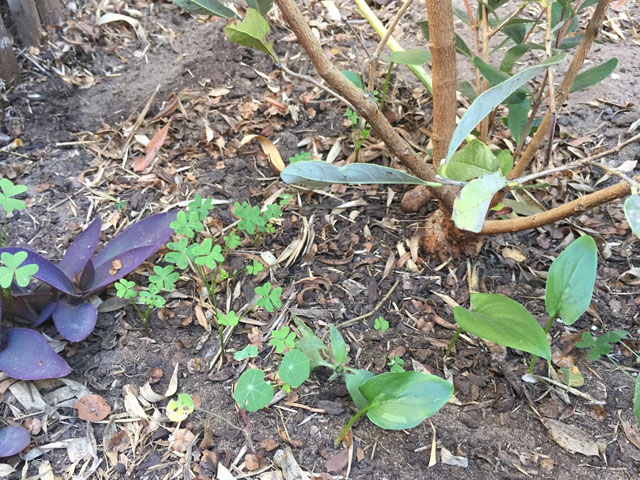
Recently I removed a lot of bamboo in the front of the house. It was not getting the water it needed and the invasive yellow oxalis was beginning to move in. After clearing the bamboo and much of the oxalis, I planted a guava against the fence. Of course, as soon as the guava was watered the oxalis returned. This was a perfect opportunity to lay down some cardboard to suppress the oxalis before it set up camp in the new planting.
Usually sheet mulching is large scale and recommended for removing a lawn or preparing a new garden plot. But sheet mulching can be done a little at a time as materials are collected and time is available. It’s less of a time commitment to do small patches, but just as satisfying to put together.
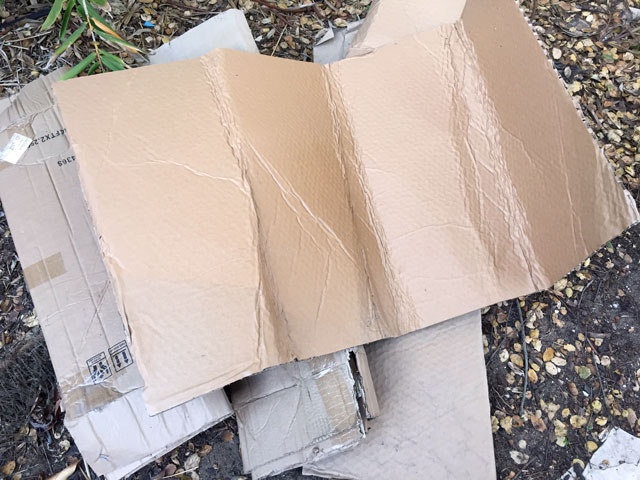
Collecting cardboard is easier because only a few pieces are required – not the mass volume needed to kill a lawn. This is true of the wood chips or mulch too. A few bags will get the job done. This is a low exertion solo job; no crew required.
Here are the basic steps:
- Prepare the area that will be sheet mulched by removing tall plants, stems, clods or other objects that will prevent the cardboard from laying flat
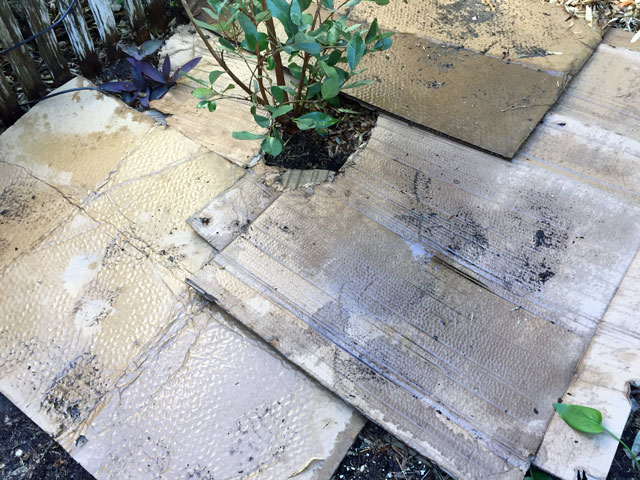
- Remove tape, labels and staples from the cardboard – collapse box to lay flat
- Wet the soil of the area where the cardboard will be installed
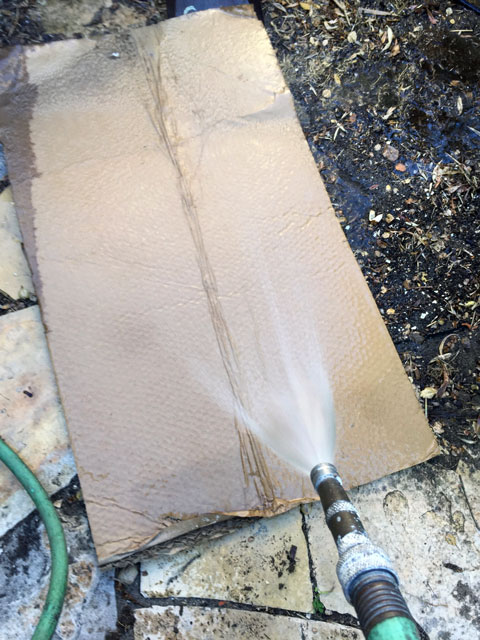
- Pre-wet the cardboard – it will conform to the soil better when soggy
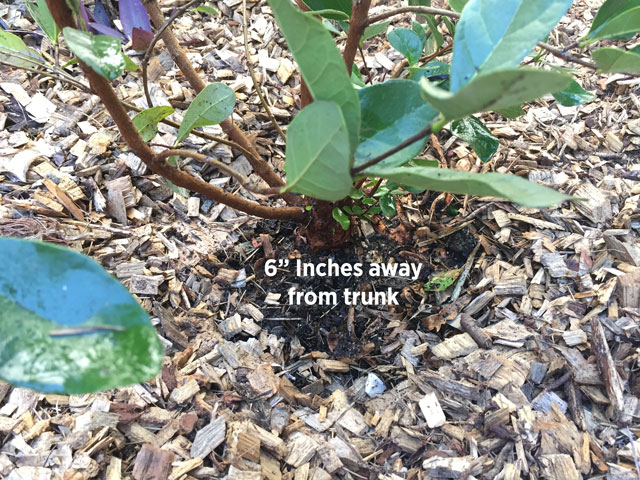
- Arrange the cardboard around the planting leaving room around the base of the plant – about 6″
- Make sure and overlap any cardboard pieces at least 4″ so that the weeds don’t grow up through the spaces in between
- Give the cardboard another spritz of water to make sure it is laying flat
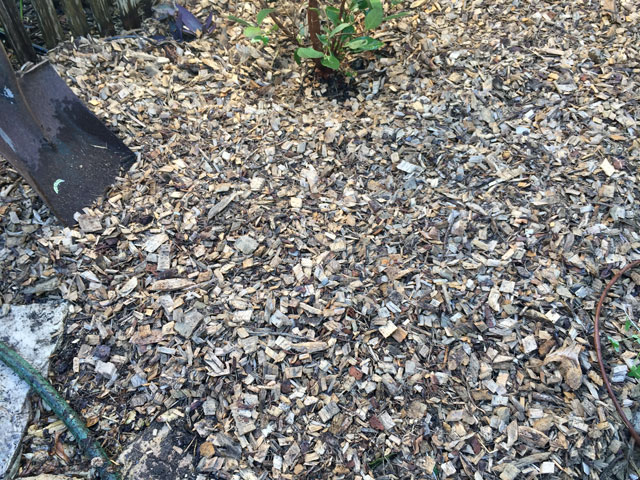
- Cover all the cardboard with wood chips to a depth of 4″ (depending on wood chip materials – more if mostly composed of greens like leaves and pine needles)
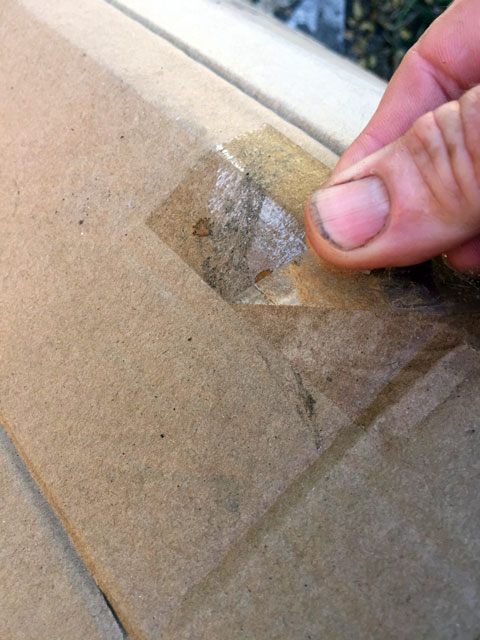
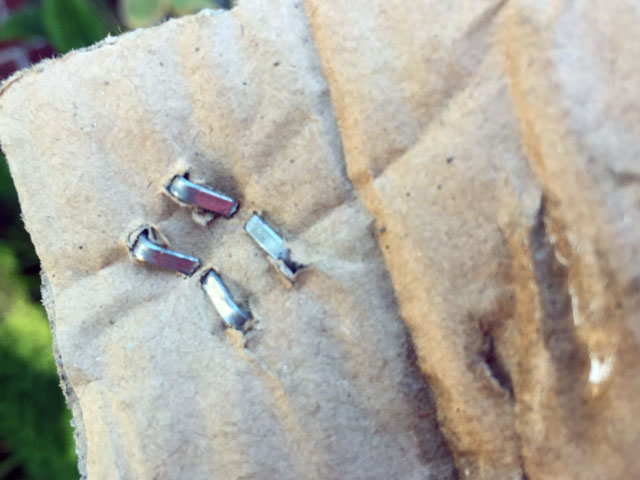
Any labels, tape or staples should be considered contaminants and be removed in advance of installation. The tape or labels will resurface as the cardboard and wood chips break down. It is not a good look.
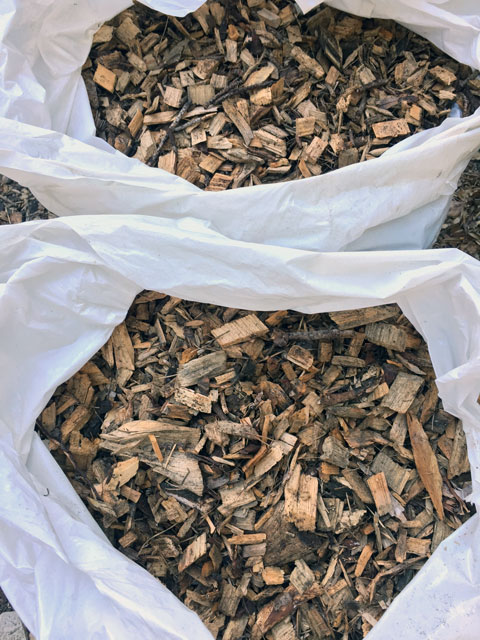
Wood chips can vary greatly depending on the tree source. Sometimes the chips have lots of ground up branches and leaves and it is quite light and fluffy. Branches are described as the ramial portion of the tree and carry most of the nutrients from the growing tips. Chips from branches will break down very fast and lose volume quickly. This type of wood chip should be applied with a greater depth with this loss in mind—say 4′-6″
Wood chips from the heavier trunk portions of trees are made up of woody lignins. Lignin tissue takes much longer to break down—sometimes years if sourced from hardwood. Wood chips from these sources can be applied at 4″ or less (but enough to completely cover the cardboard).
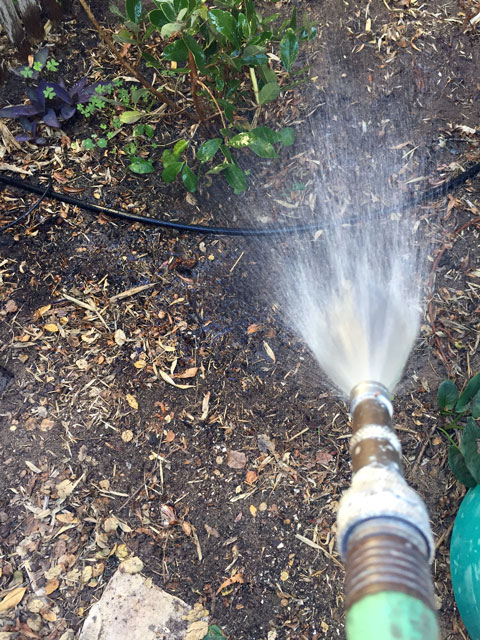
Pre-wetting the ground and the cardboard is the defining step that makes for an aesthetically pleasing installation. Skipping the pre-wetting will create curling cardboard that pokes up rudely and ruining the installation. Wetting all after spreading is not the same effect. Don’t skip pre-wetting!
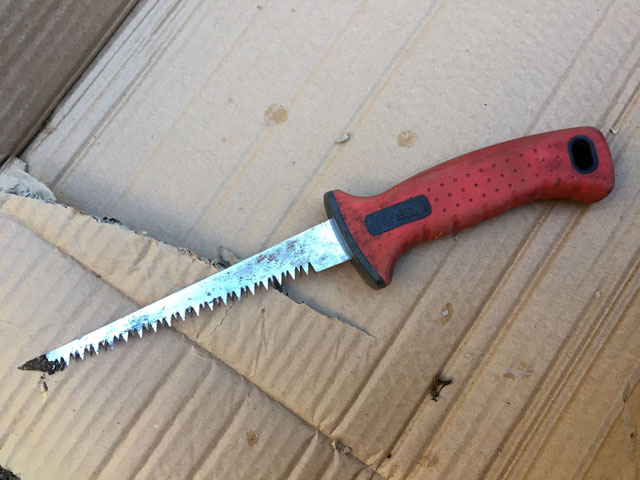
Most sheet mulching how-to’s recommend using a utility knife to cut the cardboard, but I find that they are inadequate for double thickness or wet cardboard. My favorite tool has been a dry wall knife that can really punch through the cardboard even when wet. Be mindful that this blade can give a wicked cut if handled carelessly!
Make sure that there is about 6″ of open soil around the trunk with the cardboard AND after putting down the chips. Pilling up wood chips around the trunk in a “wood chip volcano” just promotes bacterial rots and fungus by holding moisture close to the trunk and preventing air flow. Avoid causing long term problems for your trees and shrubs!
That is all there is to small scale sheet mulching. It is easy to extend the sheet mulching at a later time by adding new card board overlapping the old the cardboard edges. Just move the wood chips off a bit at the edge and start a new course of cardboard. More chips are added to the new areas of cardboard.
The cardboard should last about a year before breaking down into nutrients for the soil. During that time the cardboard will effectively block the light to weed seeds and prevent sprouting growth. Unlike polyester weed cloth, rain will be able to percolate into the soil through the cardboard adding seasonal moisture. It is amazing how many worms show up in a sheet mulched area!
In the case of oxalis, it takes several years of repeated applications of sheet mulching to really control this invasive South African bulb. Oxalis has a deep bulb that can survive years of drought. If reapplying sheet mulch and chips DO NOT RAKE BACK THE OLD WOOD CHIPS TO REUSE! This can transfer seeds from the oxalis into the new layer of wood chips. Instead, just cover the old wood chips with new cardboard and then add the new chips over the top.
Happy sheet mulching!