
Sometimes a slowly developing garden project can be very satisfying – even when it is spread out over several seasons.
Year One
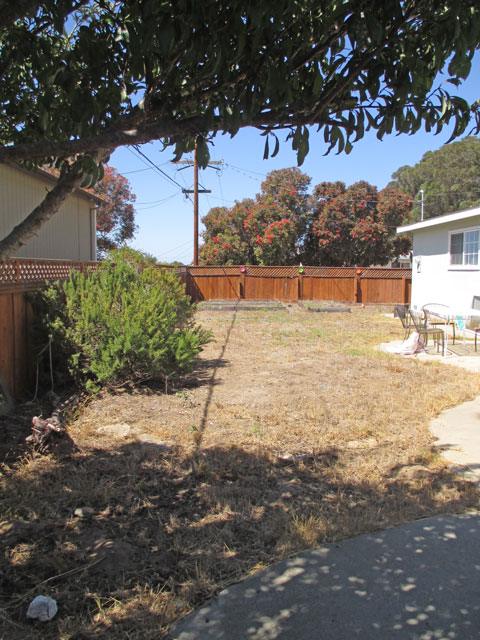
Margaret’s garden began with a desire to create outdoor space for entertaining and play area for a new grandchild with the blank slate of her yard. There had been an era of lawn—long dead—with only the bones of the sprinkler system and the trashy green turf netting peeking out of the weedy sandy soil. A strata of redwood bark and some rotting wooden garden beds indicated another era of discarded use. There was a single healthy Santa Rosa plum, an unknown apple, a monster rosemary bush and some climate inappropriate grapevines. But overall, the lot was devoid of structure or plantings and we could dream a new garden with little impediment.

We worked up a list of desired outcomes for the new garden. They included privacy, wind screening, herb area and vegetable bed, a patio seating area, low maintenance and drought tolerant pollinator and native plantings, and, view screening of the neighbor’s two story monolithic garage wall and free standing chimney that dominated the yard.

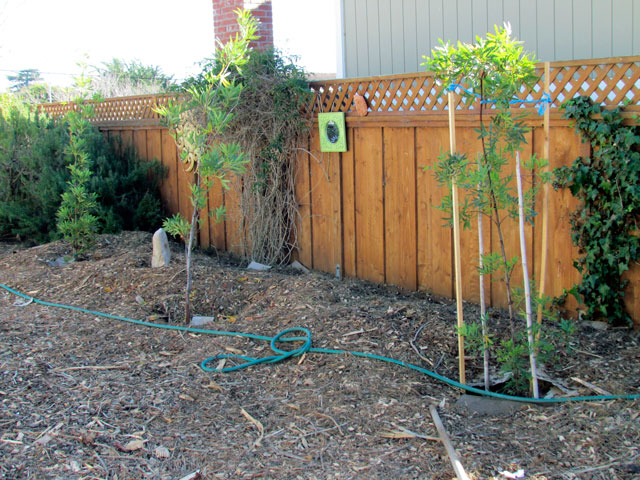
The first order of business was replacing the decaying old fence. Because there was a need to move a large shed on site, the new fence included access to the side street with a large sliding gate. This greatly simplified bringing in wood chips and bricks for later portions of the installation.
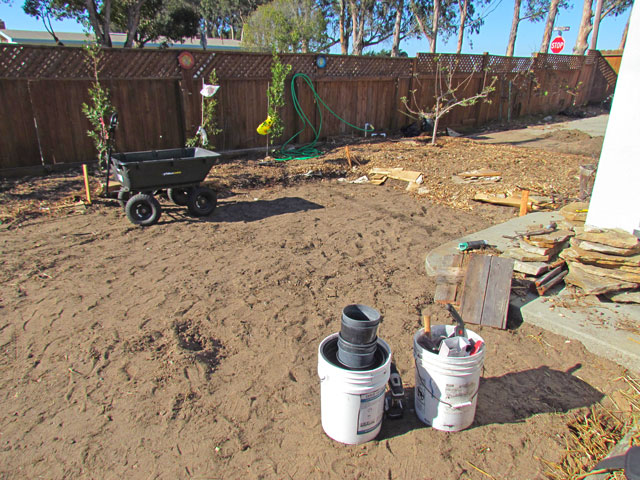
After a few months when the fence was finally secure, sheet mulching began for the entire sandy lot. If you are not familiar with sheet mulching to remove lawn, control weeds and improve soils, visit this link here. Cardboard was laid down onto the moistened sandy soil. The cardboard was then wetted down and covered with a very thick layer of free wood chips dropped off by a local tree service. That side gate came in handy yet again! The backbone Italian buck thorn hedges were planted during the sheet mulch phase around the perimeter of the fence to eventually soften the line of the fence, provide further screening and slow the prevailing wind.
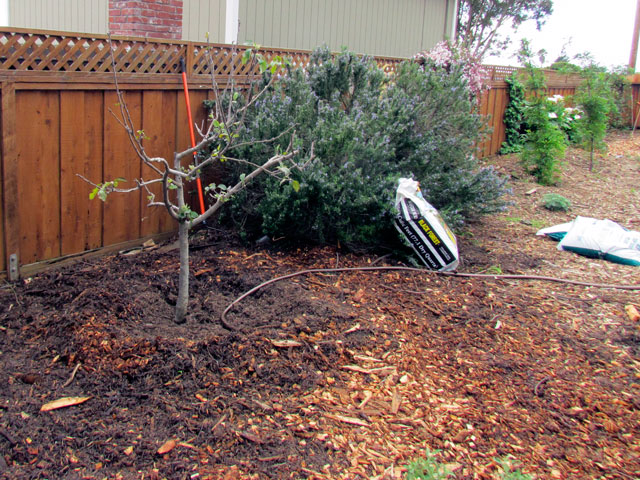
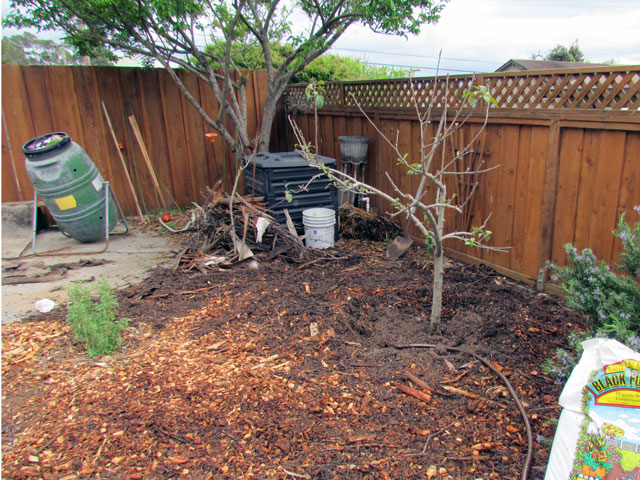
Consideration was given to watering zones and it was decided that the side yard would have native plants that would be eventually left to their own with no dry season water. So the little apple tree had to be moved around to the other side of the house to an area where watering would occur. In this case next to the existing happy plum tree and compost area. The tree was moved in late January during its dormancy (as much dormancy as you can get on the central coast anyway). Pre-treatment included deep watering and cutting around the root ball with a shovel following the drip line of the tree. This gives the roots a few weeks to grow new roots closer to the tree before excavating. The root ball was carefully dug out and wrapped with a ground cloth to drag it around to the new location. Lots of good Black Forest compost soil amendment was added to the soil when replanting and finished off with another deep watering. Not only did the tree recover admirably that spring but produced a nice handful of apples as thanks in the fall.
To create a softer view from the house, three native California Channel Islands Catalina Ironwoods (lyonothamnus floribundus) were planted in a mound. Their beautiful shaggy bark and ferny foliage will be a much improved view shed over the great expanse of painted 2-story wall!
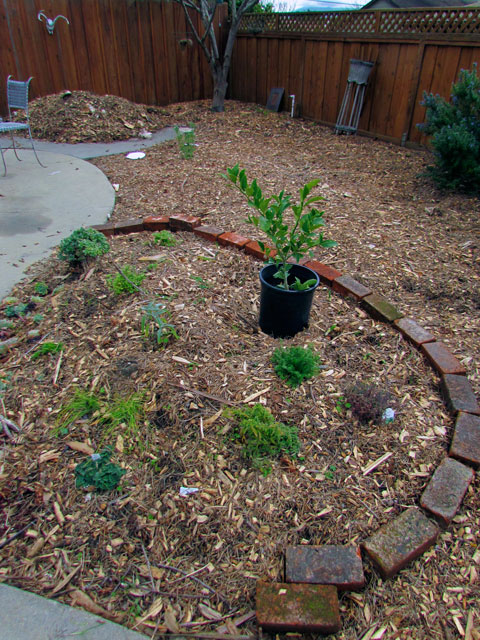
For convenience to the kitchen, the herb mound was built with extra soil moved from the patio installation and plenty of additional compost. Herbs such as thyme, oregano, marjoram and chives were planted in the mound. Succulents and Santa Barbara daisies were added around the edges along with daffodil bulbs for seasonal color. A Meyer lemon now lives in a pot and will eventually be planted into the mound. This was a way of testing if the lemon liked this location without committing entirely.
The patio area was a whirlwind one weekend work party effort by the owner’s family. With lots of hands, bricks and a good bit of know how from Margaret’s brother this DIY project turned out solid. They now have a place to gather outside with a free standing fire pit, seating and a barbecue. They can congratulate themselves on family bonding and a good job accomplished.
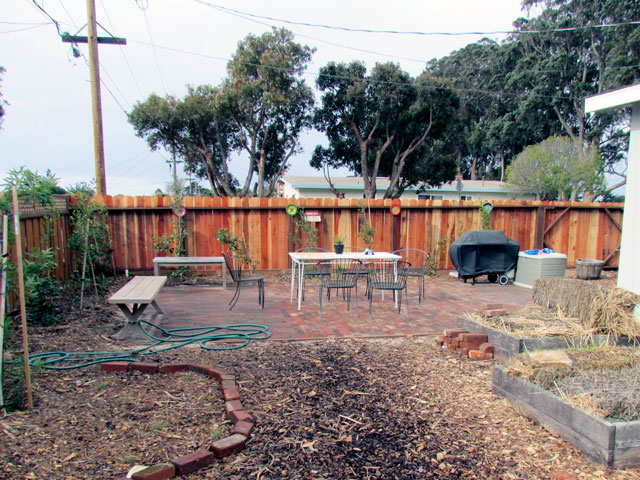
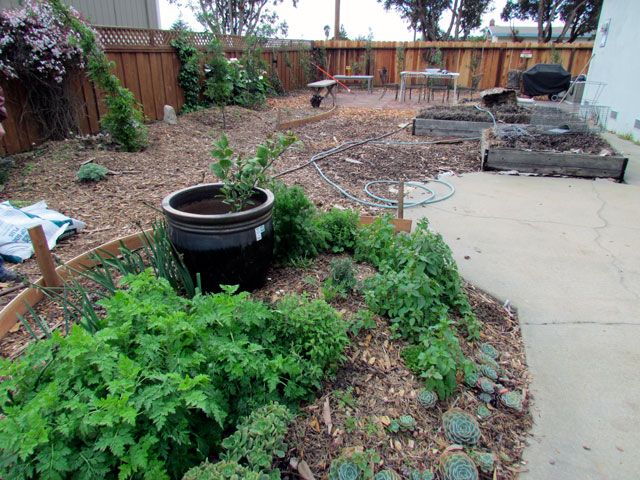
The 3 wooden beds from the previous tenant were re-purposed for another year. We moved them next to the house and filled with rotting straw bales (visible top right in image above). That summer had some fantastic tomatoes that sprawled beyond the beds and provided tomatoes into November. A year later, this feature was replaced by a more formal landscaped mound (see next post).